

Annotate Datasets
DagsHub provides an easy way to annotate your datasets, via DagsHub Annotations (based on the Label Studio Integration).
Annotations are also integrated into Data Engine, providing an easy way to annotate data and generate high-quality datasets for training.
Let's see how you can easily annotate your datasets and visualize the annotations, and use them to train a model with DagsHub. For the full annotation features, see the feature page.
DagsHub annotations are free for public projects, and part of the Team Tier for private projects.
Uploading or connecting your dataset
Before annotating your data, you'll need to upload or connect the first version of your dataset, and create a datasource from it.
For the purpose of this guide, we'll go with the simplest option, uploading a dataset to DagsHub. We'll use a segment
of the COCO 1K dataset. Make sure to create a repository, then in the following snippet
replace the <repo_owner> and <repo_name> with your user and repository name respectively. Everything else should work.
Start by installing DagsHub (pip install -U dagshub), and make sure you're in your workspace.
Then run the following snippet:
from dagshub import get_repo_bucket_client
from dagshub.data_engine import datasources

# This retrieves the sample dataset an puts it in a folder called "data/". If you already have your own data there, then skip this line
ds = datasources.get('Dean/COCO_1K', 'COCO_1K')
ds.head(50).download_files(target_dir=".")

# Upload folder contents
client = get_repo_bucket_client("<repo_owner>/<repo_name>", flavor="s3fs")
client.put("data/", "<repo_name>/data", recursive=True)

# Create a datasource
datasources.create_datasource(repo="<repo_owner>/<repo_name>", name="hello-world", path="s3://<repo_name>/data")
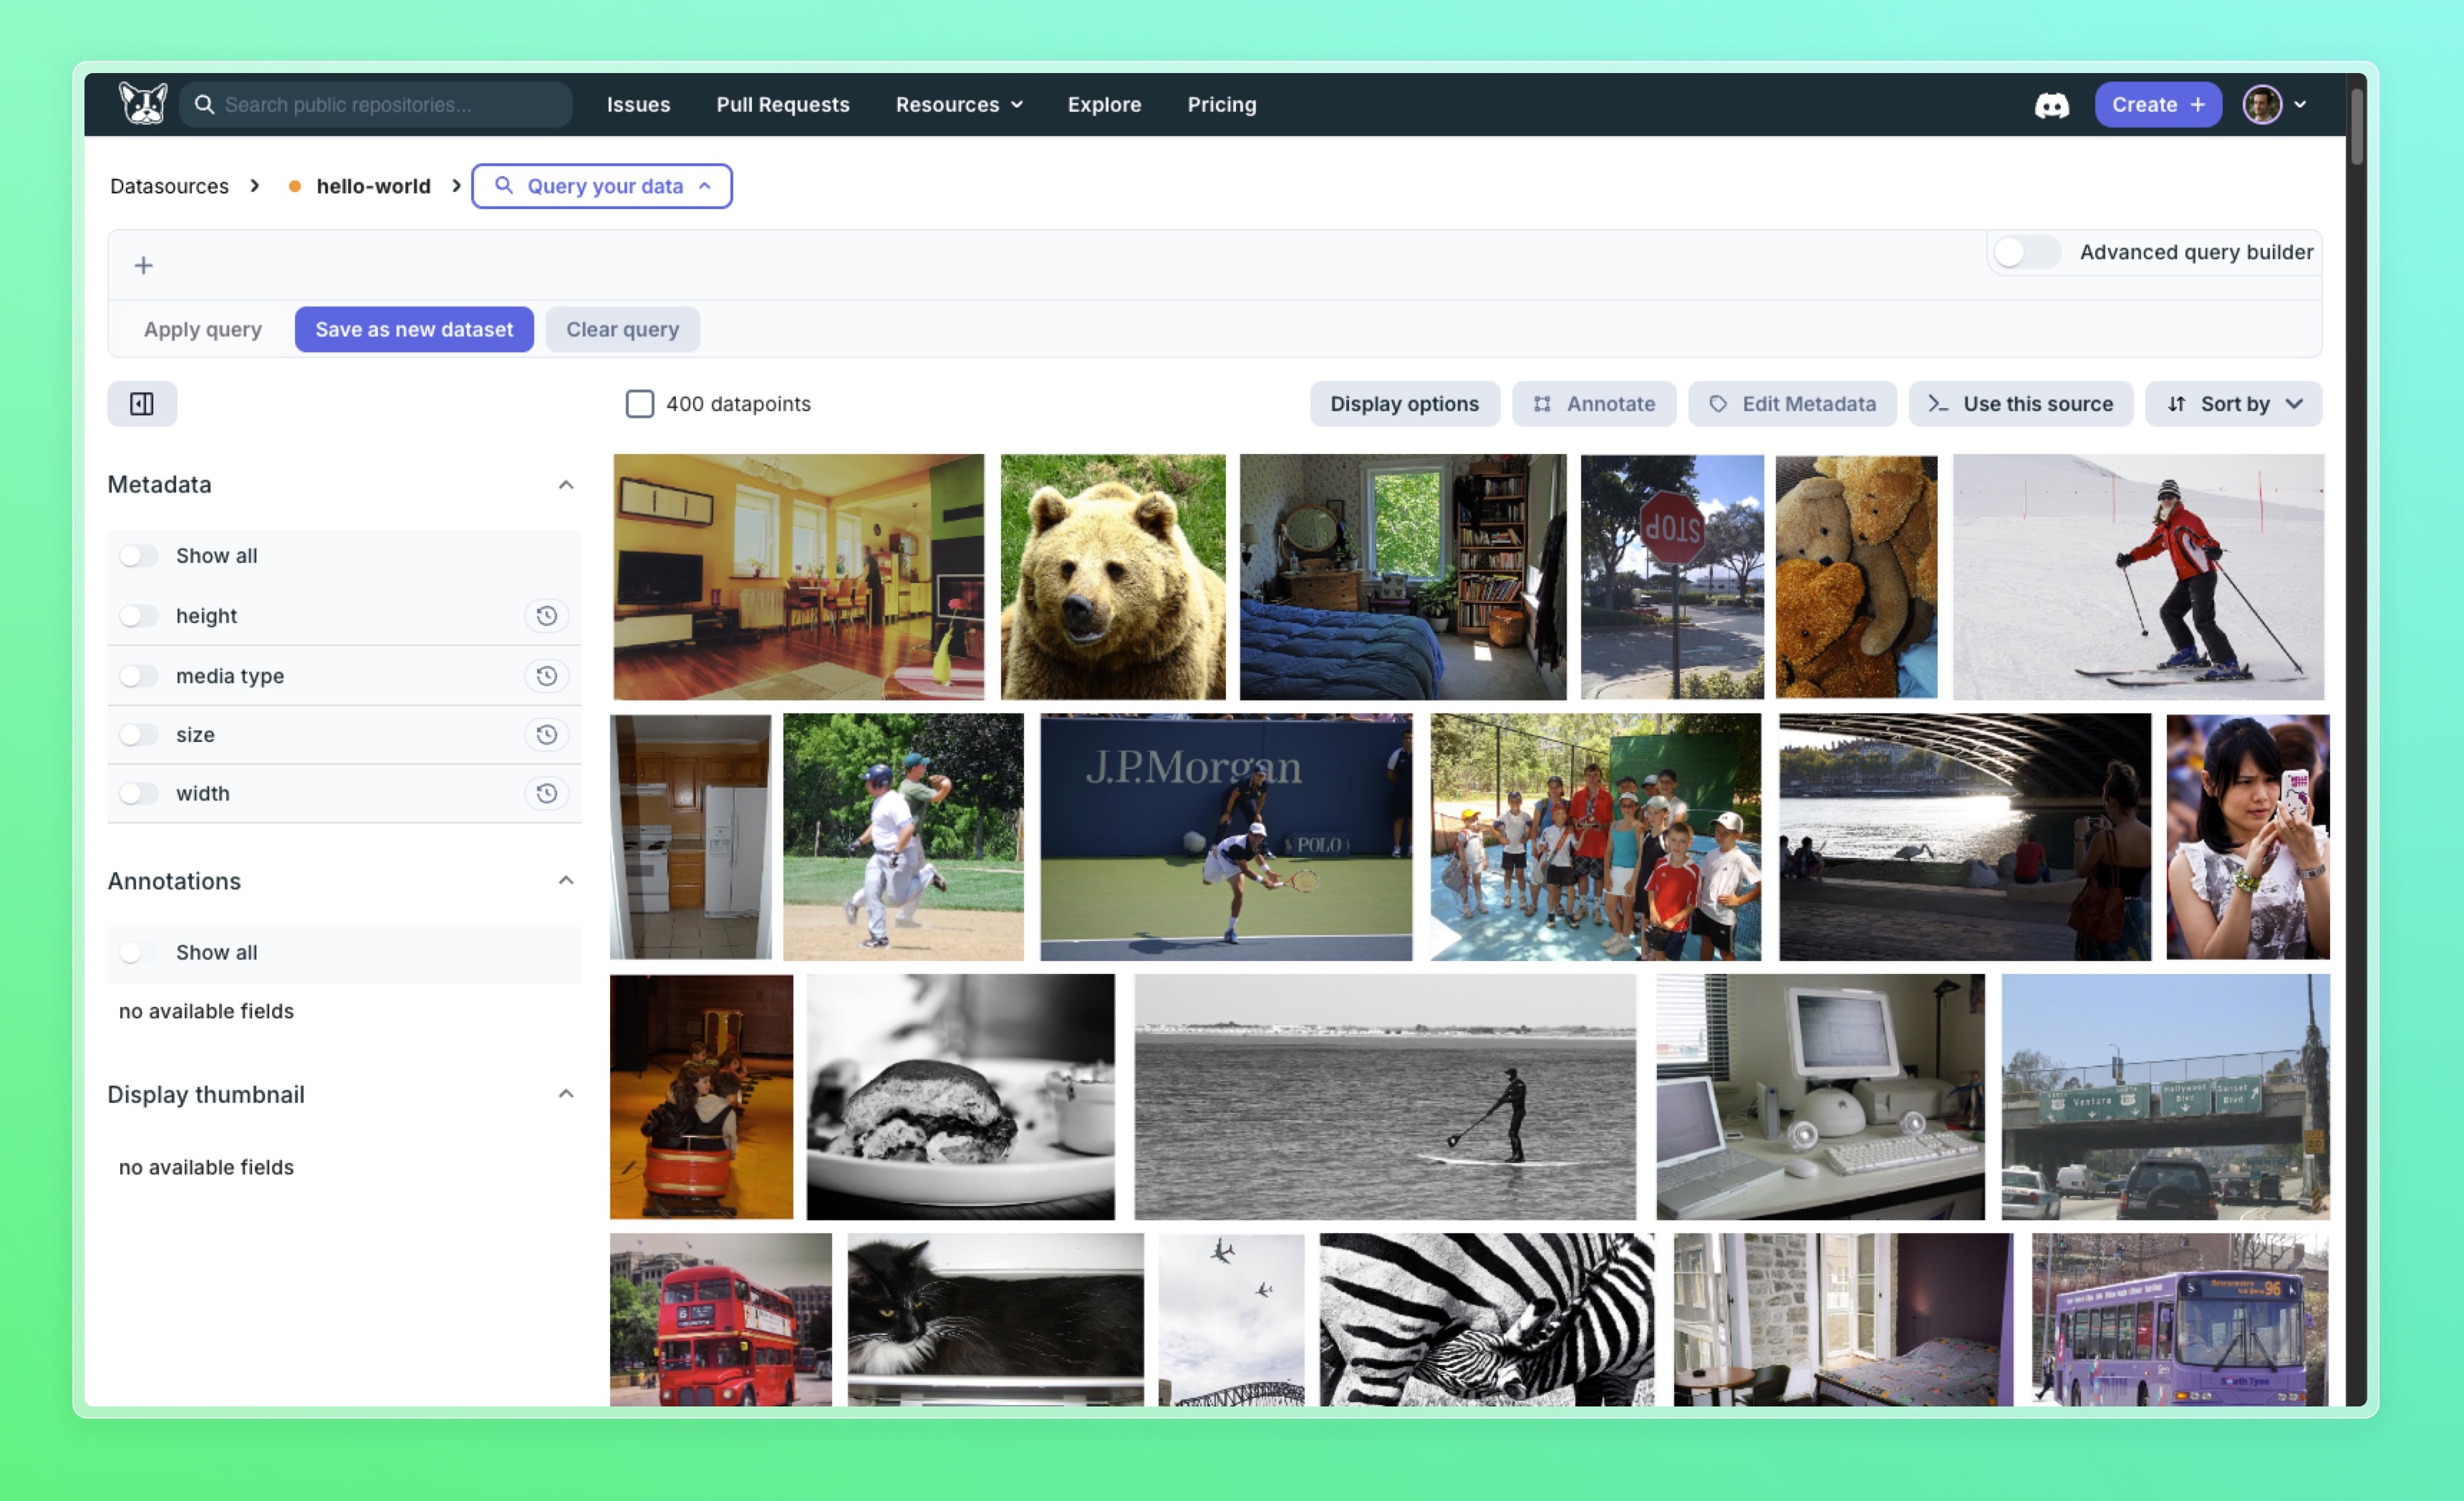
After this you should see the dataset in your project's Datasets tab (the view below is after you click on "visualize" that dataset):
Import existing annotations
DagsHub's client enables you to import existing annotations from your previous projects.
Assuming your annotation files are saved to a local file and have a YOLO or CVAT compatible YAML file - e.g.
annotations.yaml, use the following Python command to import them.
ds.import_annotations_from_files(
    annotation_type="yolo", # or 'cvat'
    path="annotations.yaml",
    field="imported_annotations", # name of the field that we'll import the annotations into
    yolo_type="segmentation" # required for YOLO annotations
)
Where ds is the Data Engine Datasource which
has the relevant images scanned. To see the full documentation for this function, see the
client docs.
Supported formats for annotation imports
We currently support the following annotation formats for import:
- Computer Vision:
- YOLO: bounding boxes, segmentation maps, keypoints
- CVAT: bounding boxes, segmentation maps, keypoints
Send data points to be annotated
There are 3 ways to send datasets to be annotated. You can use the DagsHub UI, DagsHub client or use the local visualization instance.
Send to annotation using the DagsHub UI
Sending through the UI is the easiest, most straight forward way for most users as it doesn't require running any code.
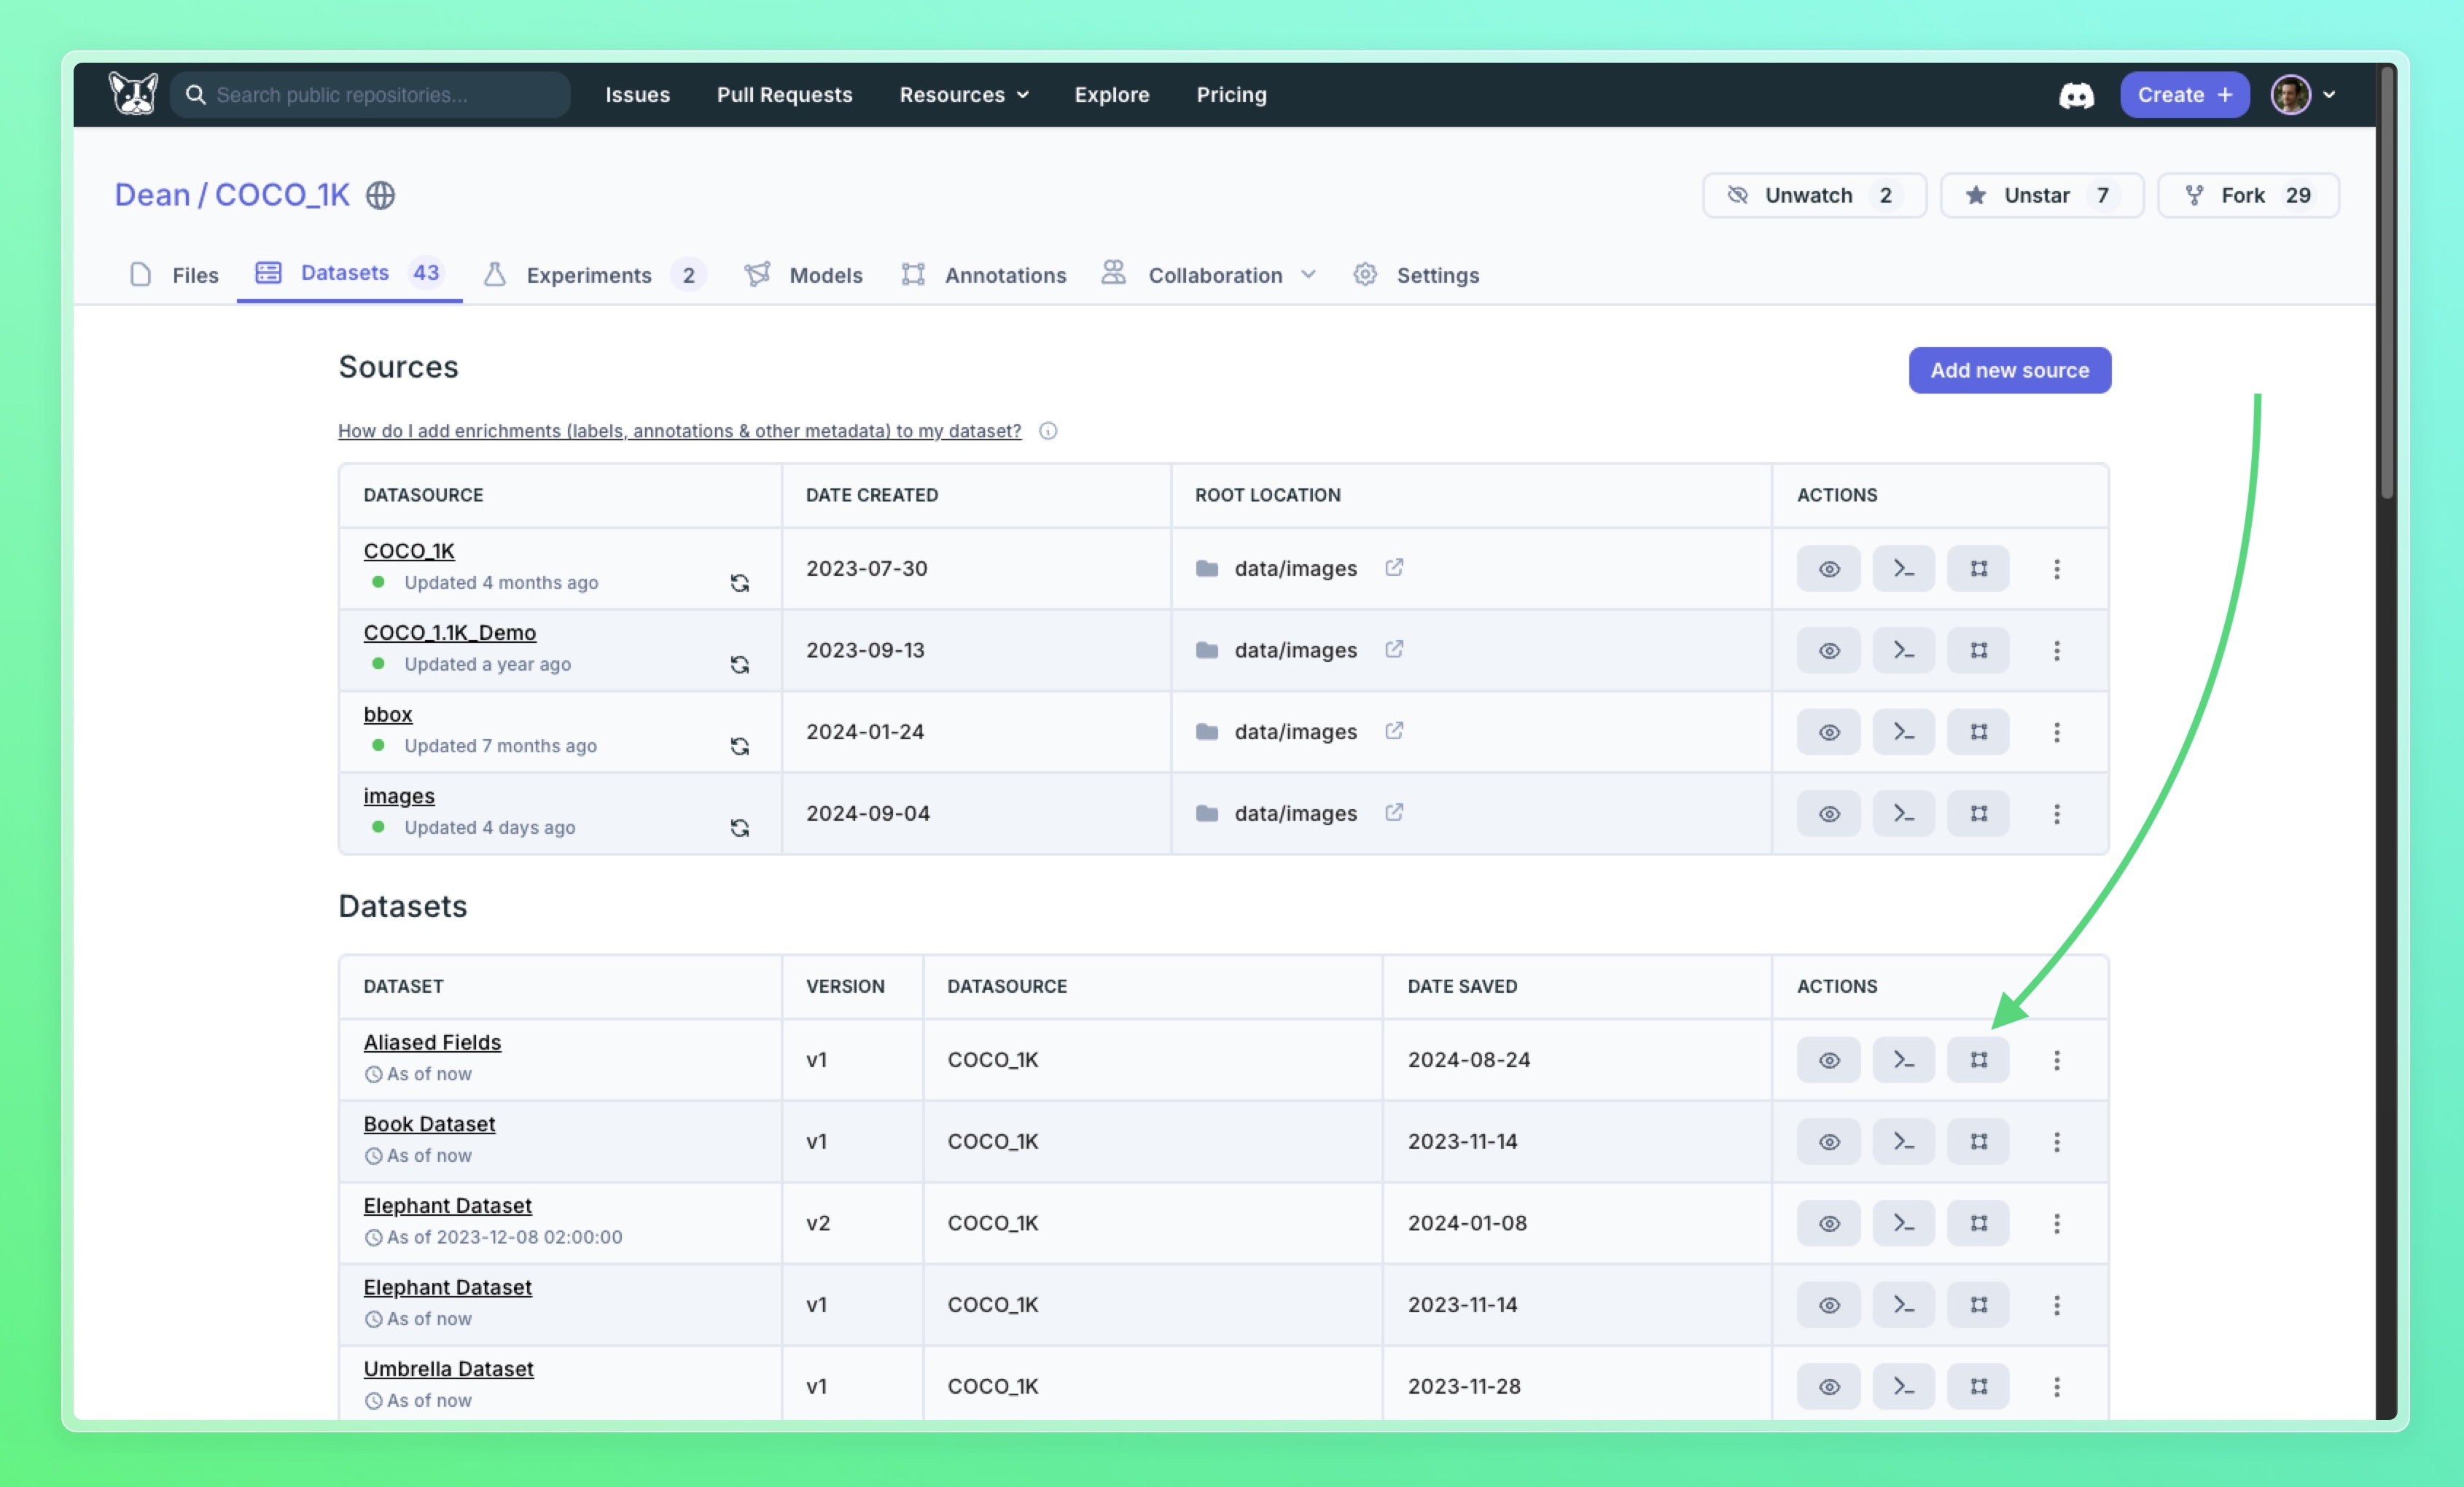
-
You can annotate an entire datasource by clicking the annotate button in the datasets tab:
-
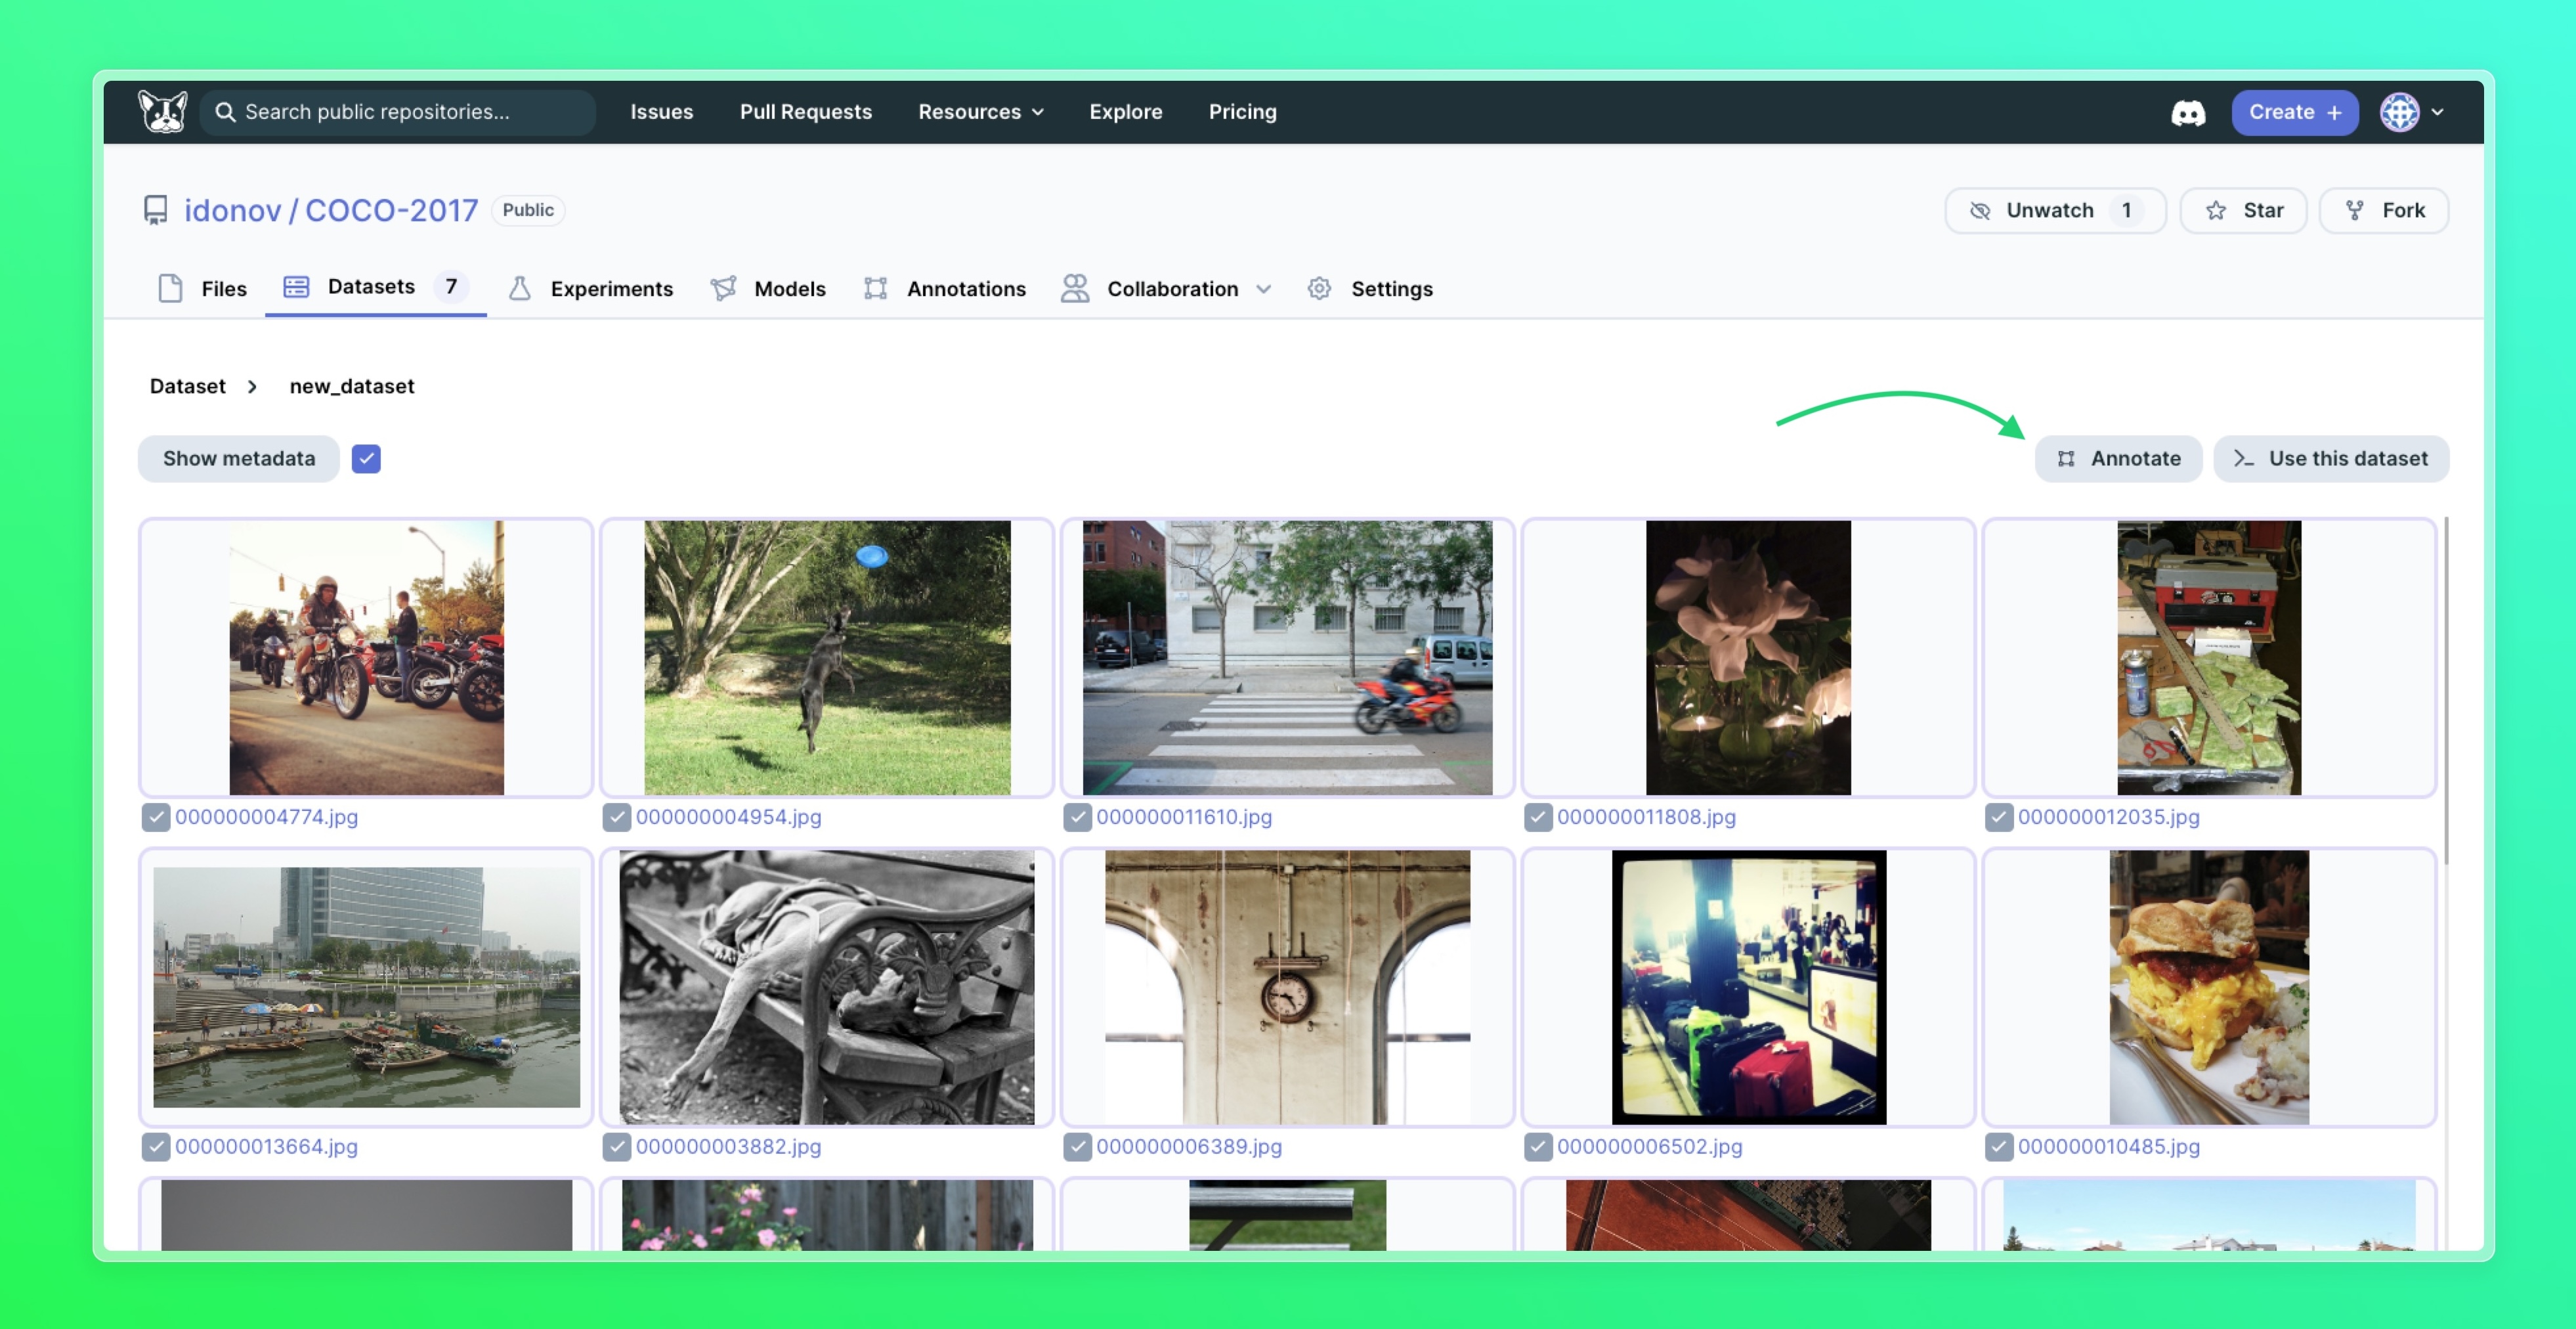
You can also select specific data points to annotate, by going into the dataset or datasource view, selecting any number of images, and clicking the Annotate button.
Tip: easily select multiple datapoints
You can use Shift+Click to select multiple data points easily, or the checkbox at the top to select all the datapoints.
Send to annotation using the DagsHub client
Sending to annotations using the client gives you the flexibility to pre-filter your dataset and only send parts of it to be annotated. This can be especially useful when working on improving the quality of your dataset, where you wouldn't necessarily want to redo the entire dataset's labels, but only parts.
To send data points to annotations using Dagshub client, use the .annotate() function:
# Get the datasource we just created
ds = datasources.get("<repo_owner>/<repo_name>", "hello-world")

# Send all the data points in the datasource to annotation
ds.annotate()

# Send only the first 5 samples to be annotated
ds.head(5).annotate()
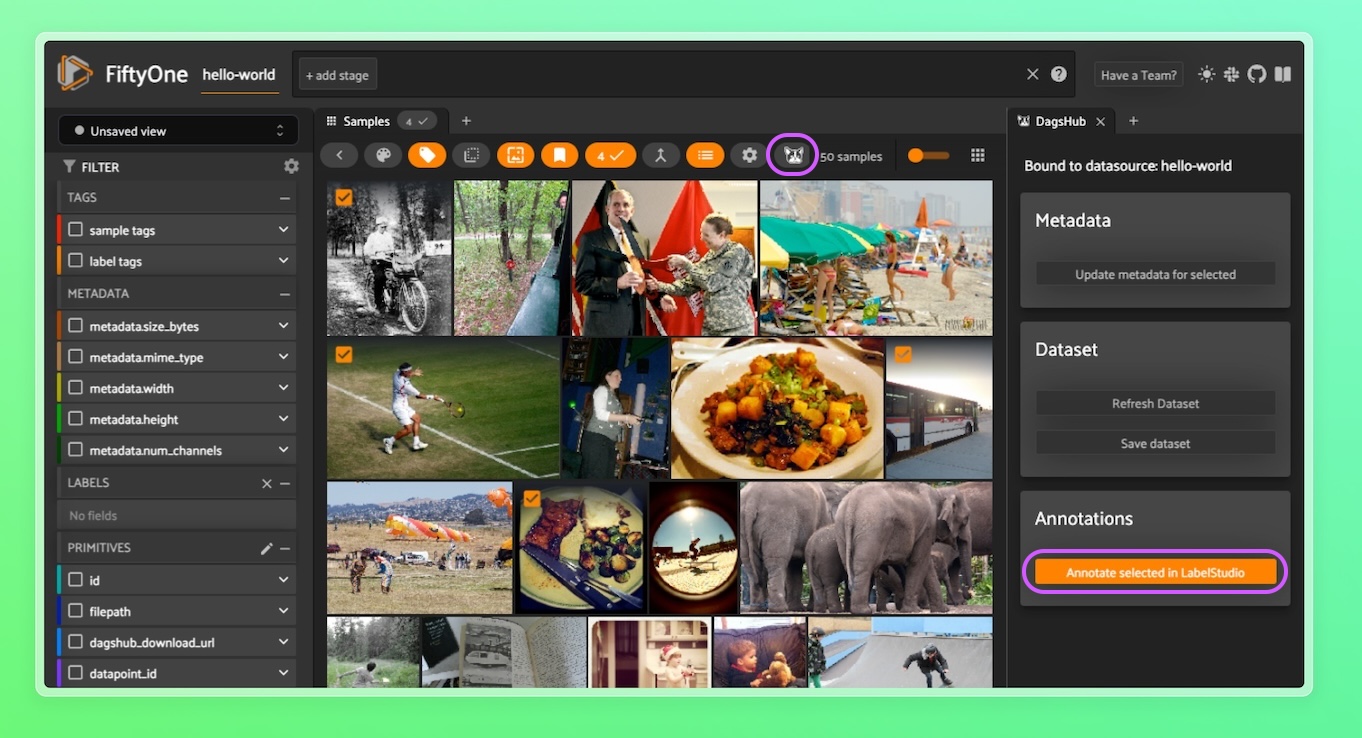
Send to annotation from the local dataset visualizer (Voxel51)
To annotate selected data points from the local visualization instance, start by visualizing your dataset:
ds.visualize()
Select the images you'd like to annotate, then navigate to the DagsHub tab (if there is no DagsHub tab, click on the ‘+’ button and choose DagsHub) and click on the ‘Annotate selected in LabelStudio’ button:
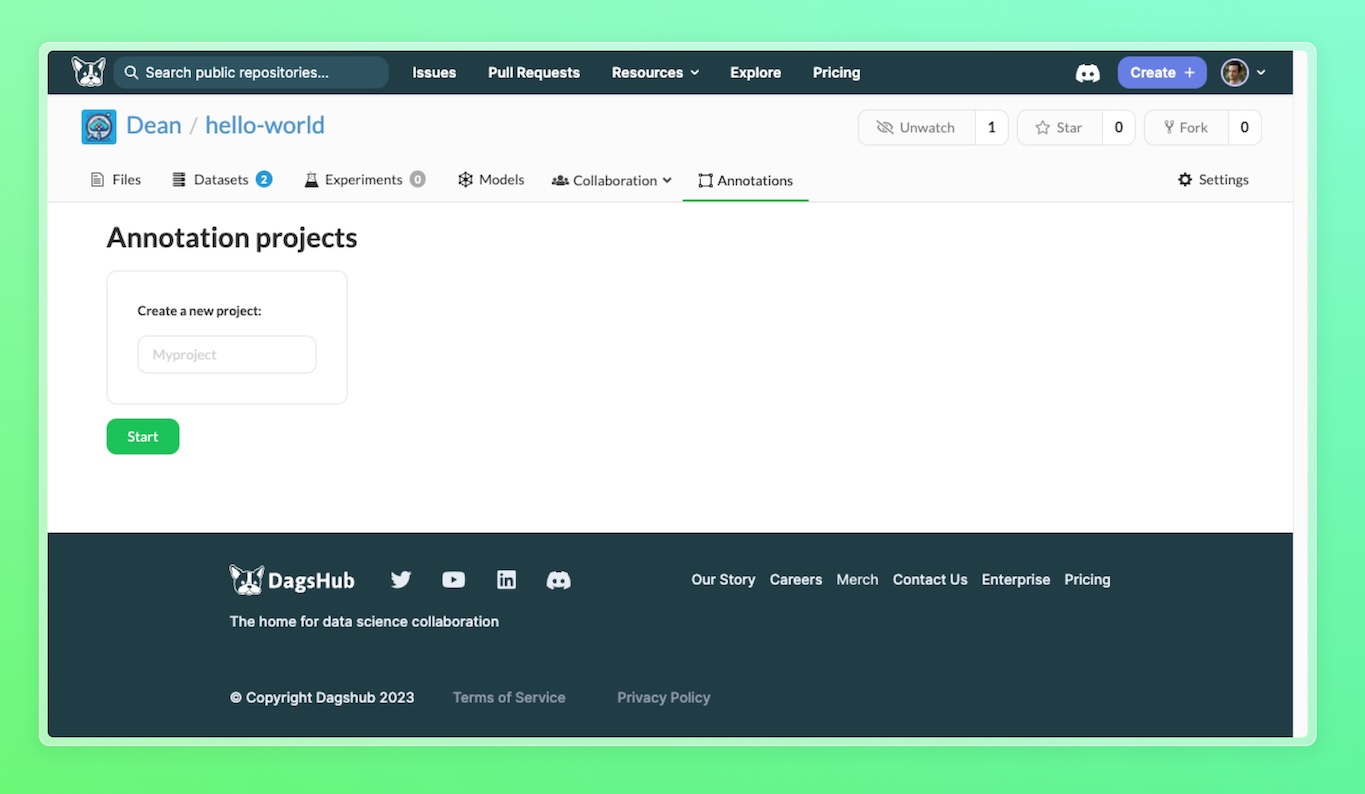
Configuring the annotation project
After sending data points for annotation, a new window with the DagsHub web platform will open. It might take a few moments to spin up the labeling server. You can play pong while waiting :)
From here you can either choose the annotation project to add the tasks to, or create a new project. This means you can manage the annotation process with multiple annotators, assigning the right tasks to the relevant annotator.
To add the selected annotation tasks to an existing annotation project, select the first option, Continue with one of the existing projects, and choose an existing one (You'll only see this option if you have a labeling project set up). To create a new annotation project, select the second option, Create new, and specify a name for it.
Using Existing Labeling Project Configurations
You can import existing configurations (annotation templates, auto-labelers, etc.) to your new project by checking the ** Use project settings of:** option and choosing an existing project.
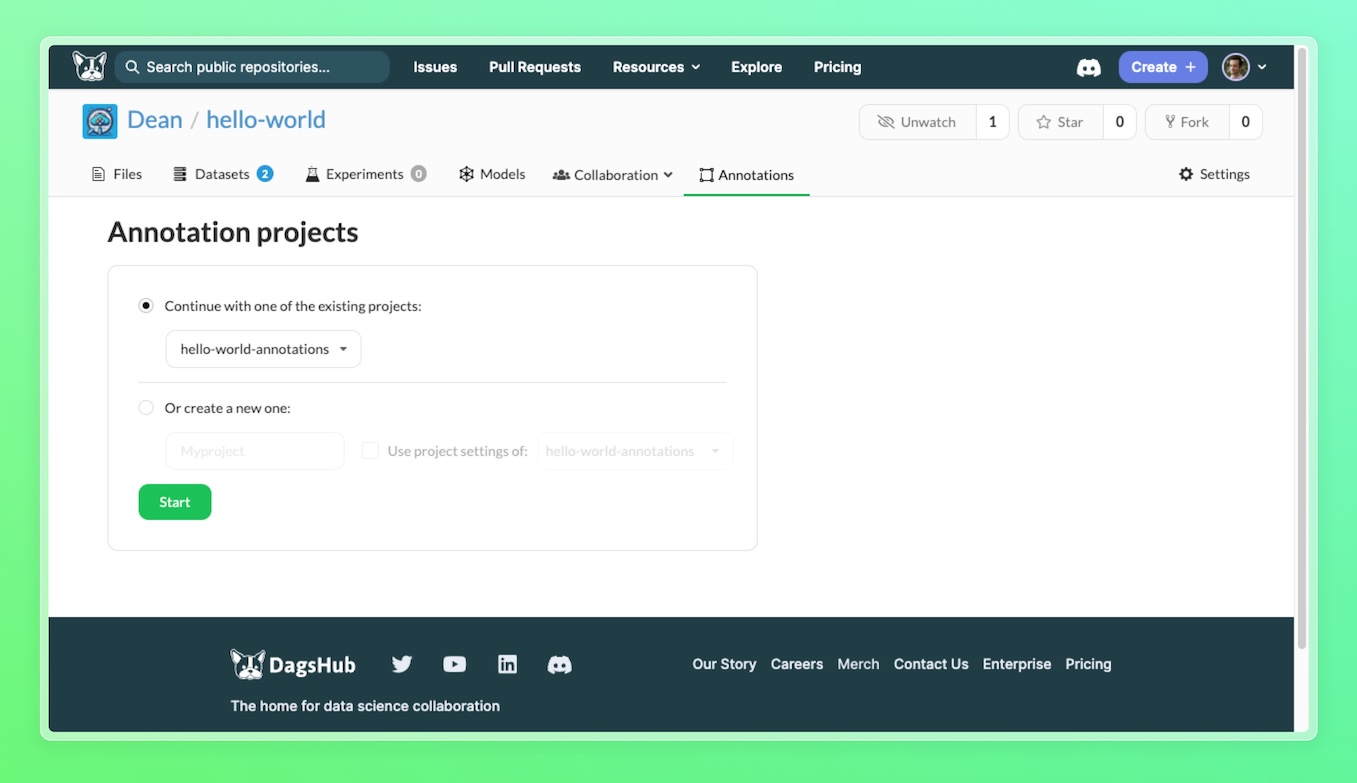
Click start, and you will be directed to your project with the relevant tasks.
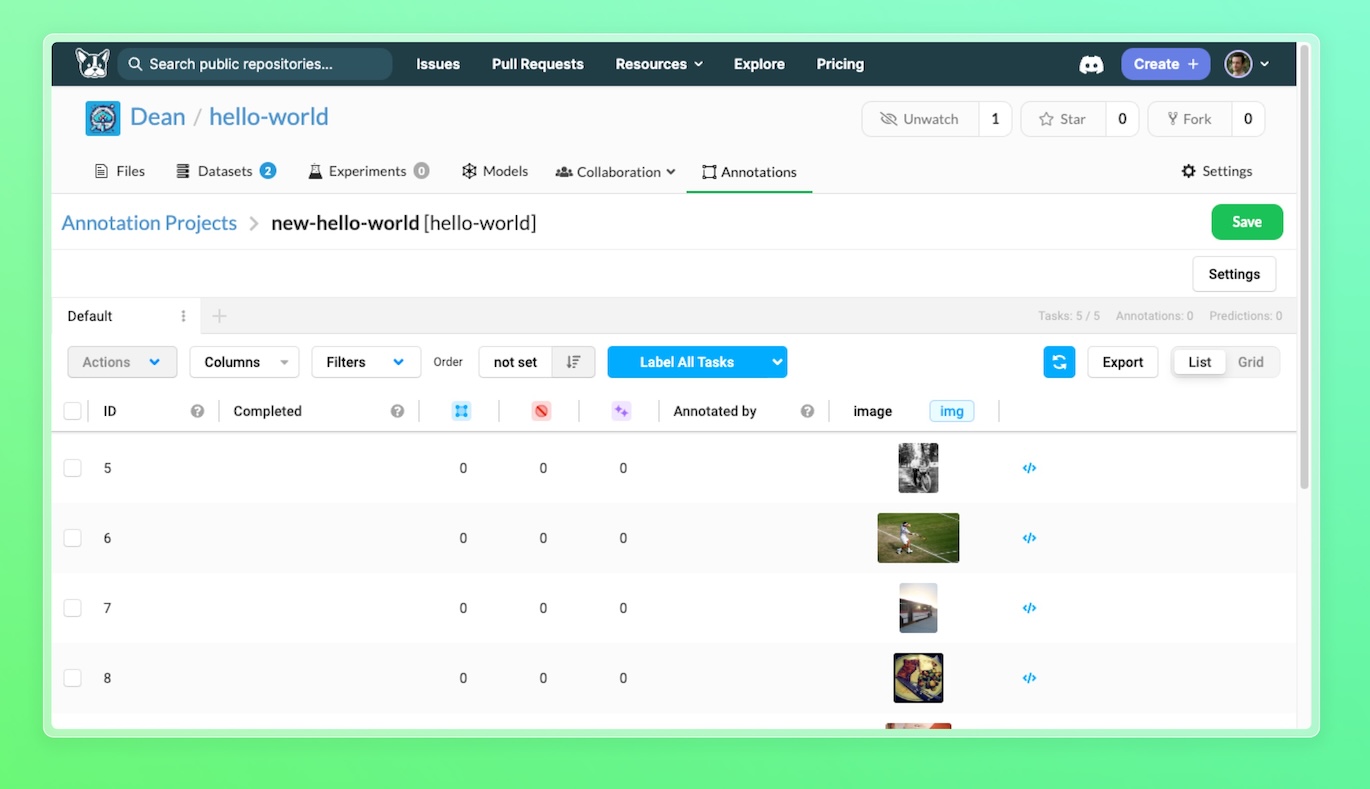
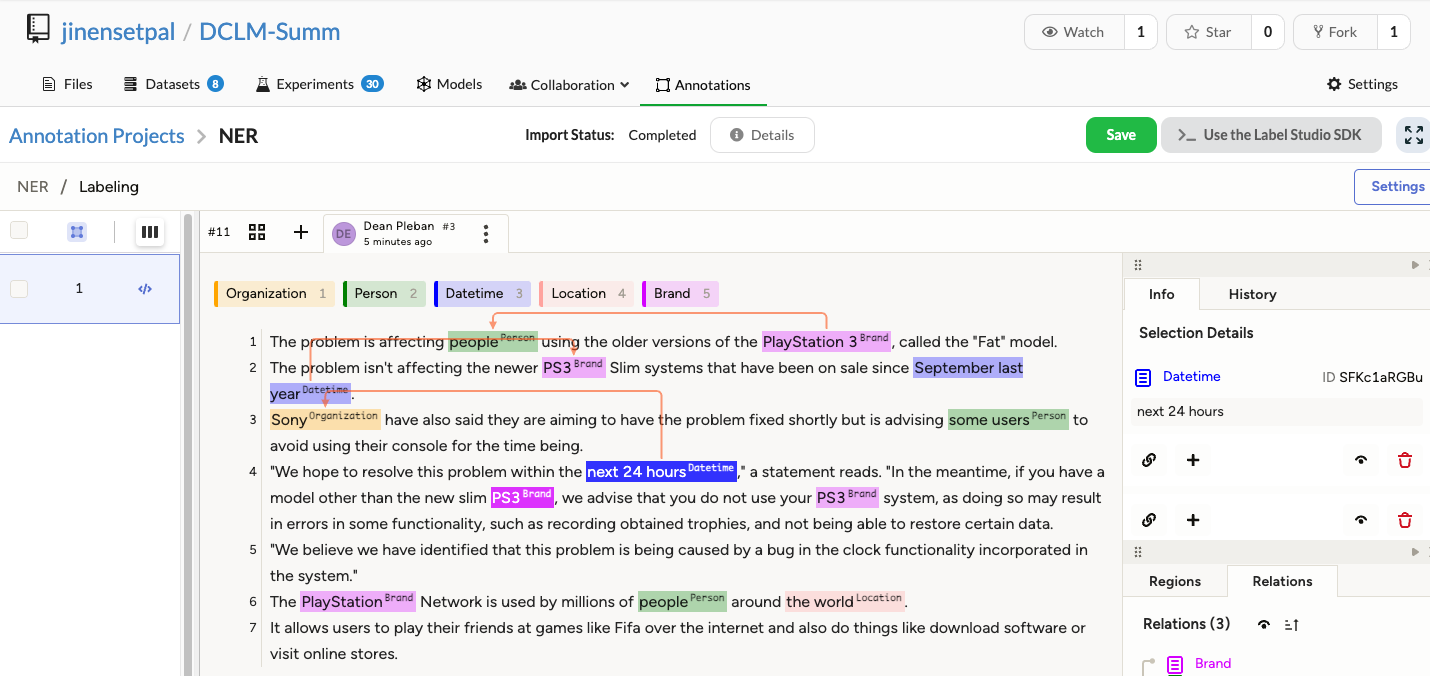
Saving annotations back to your datasource
You can update your datasource with the new annotations. To do that, annotate a datapoint (a task), then: 1. Click on the Submit button (or Update if you're updating an existing annotation. 2. Click the Save button at the top right of the screen.
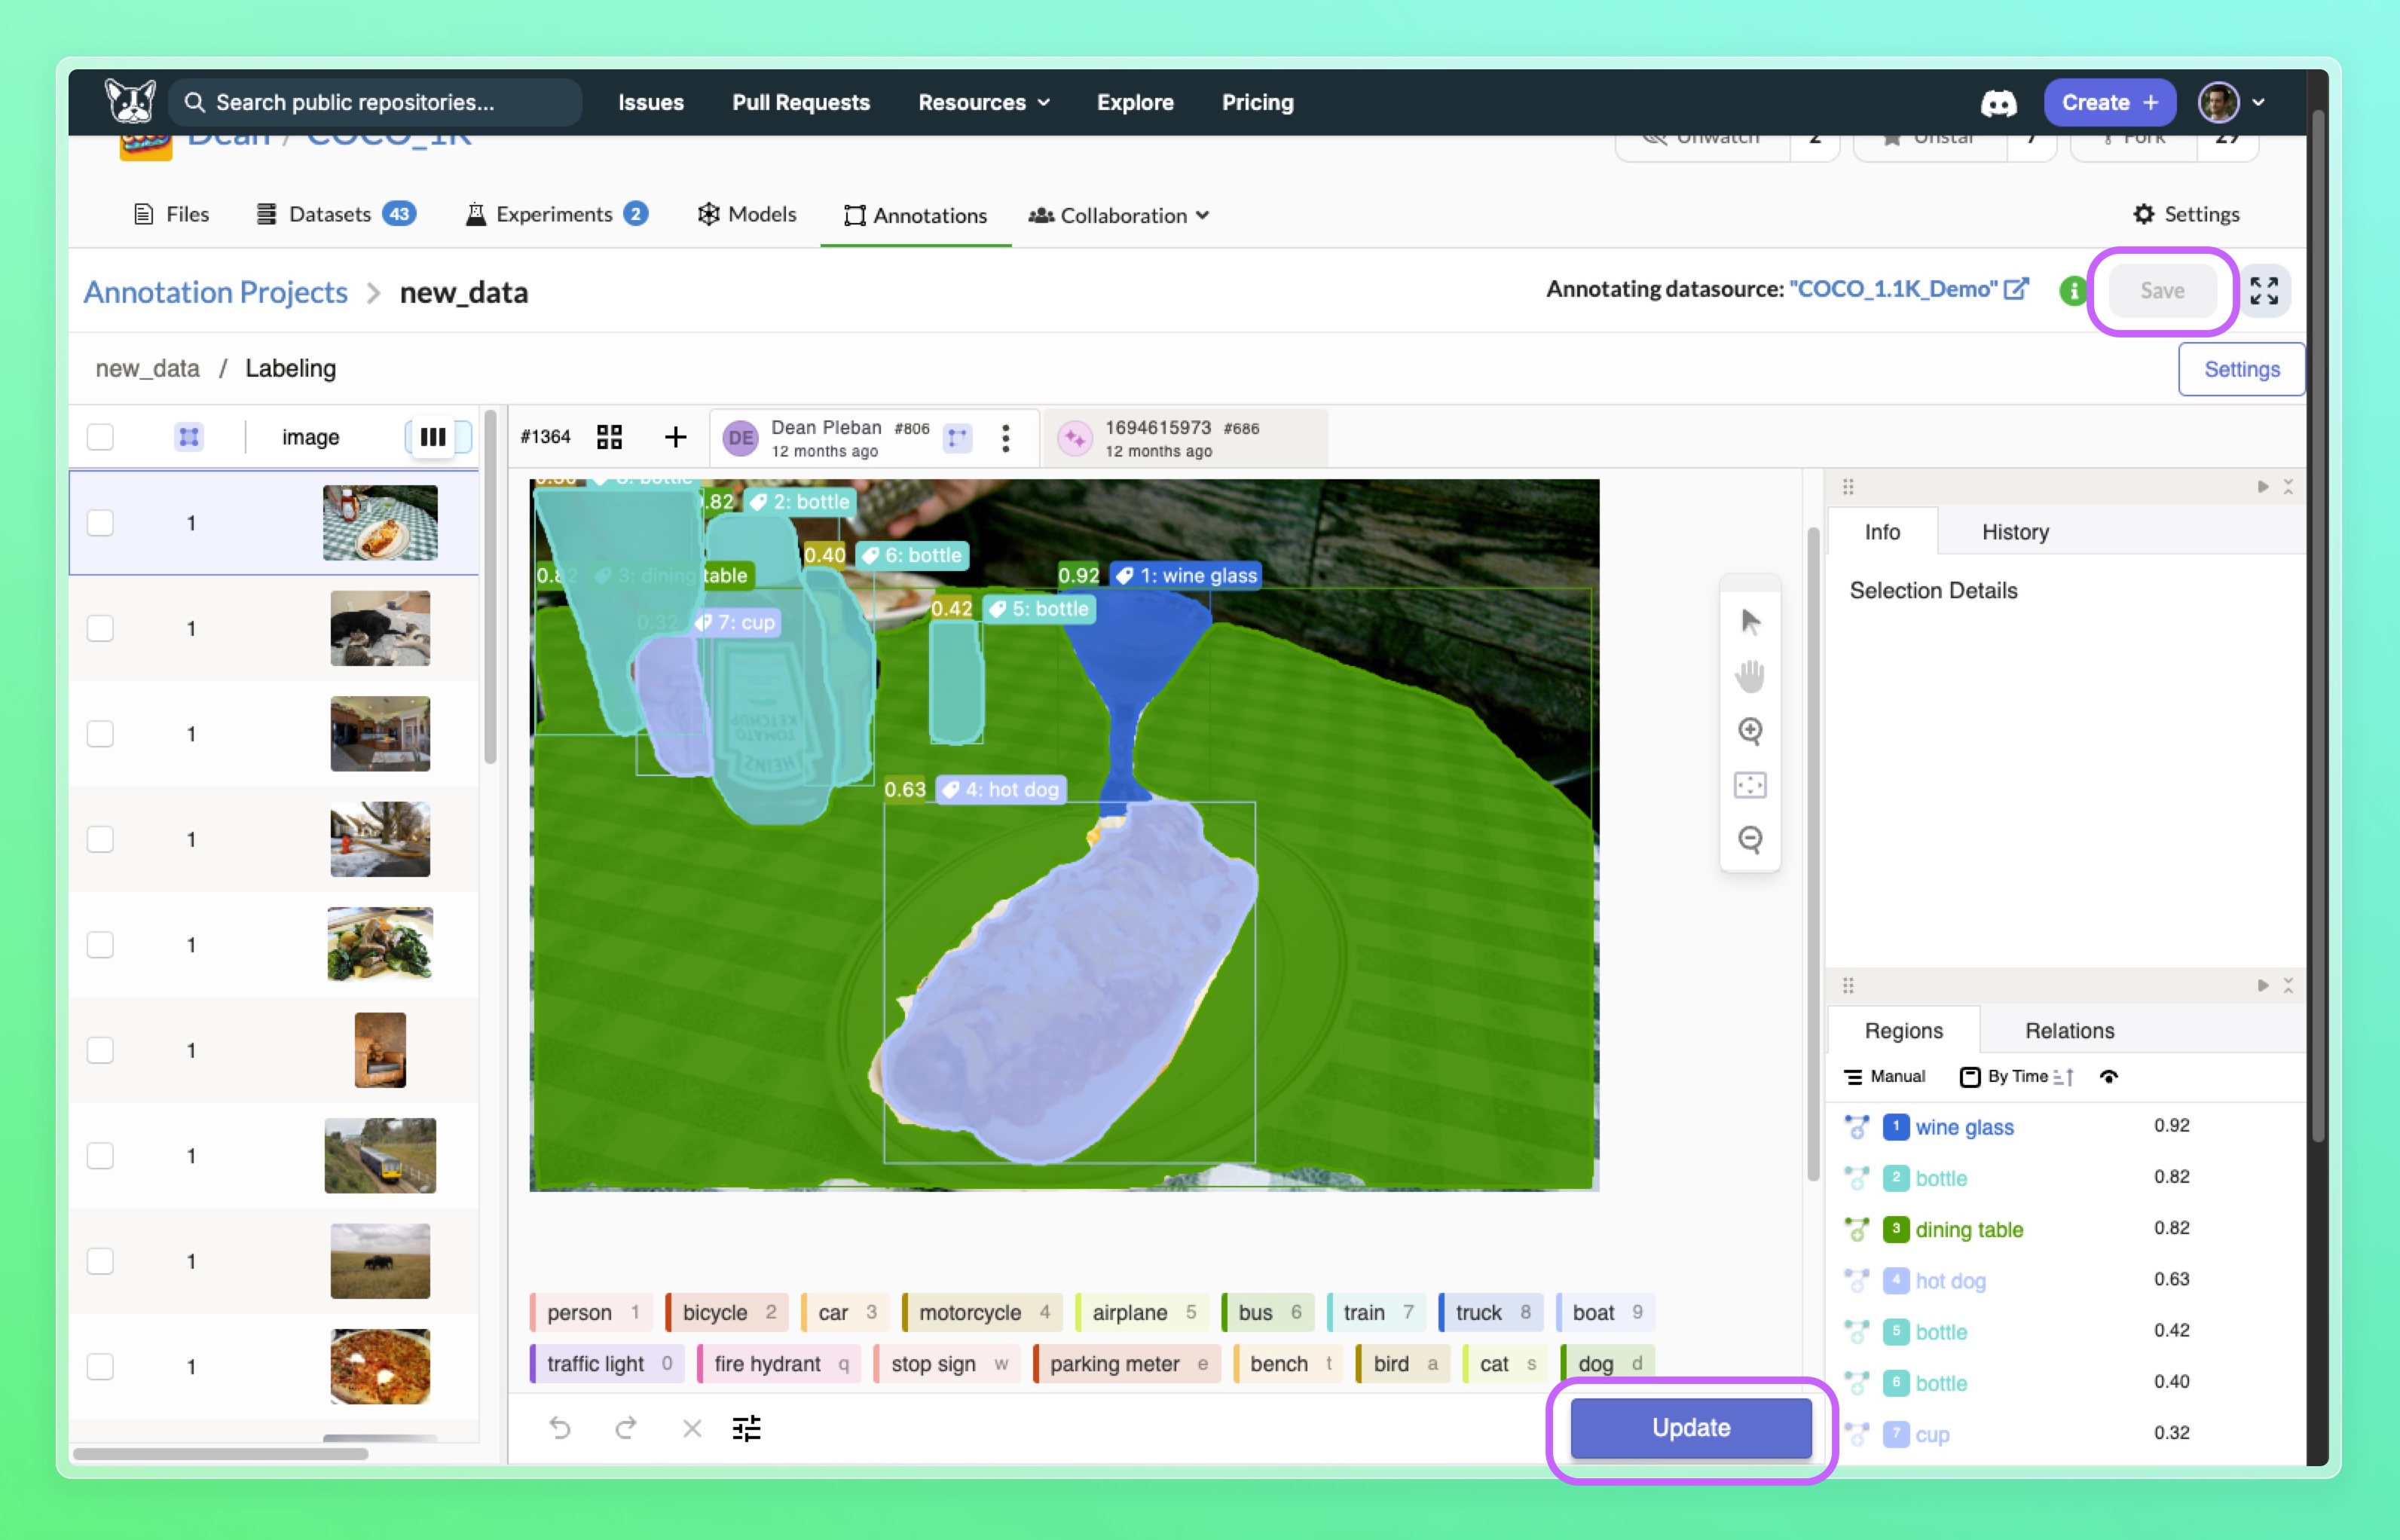
Each annotation is saved as an enrichment field, named after the annotation project name you used + the word annotation, on the corresponding data point. The annotation is saved as blob with a Label Studio json format as the content.
In addition to the annotation metadata layer, it will create another enrichment layer with the annotation classes
(called <annotation_enrichment_name>.labels.str). You can use this to query the classes per datapoint easily
(e.g. ds["annotation.labels.str"].contains("cat")).
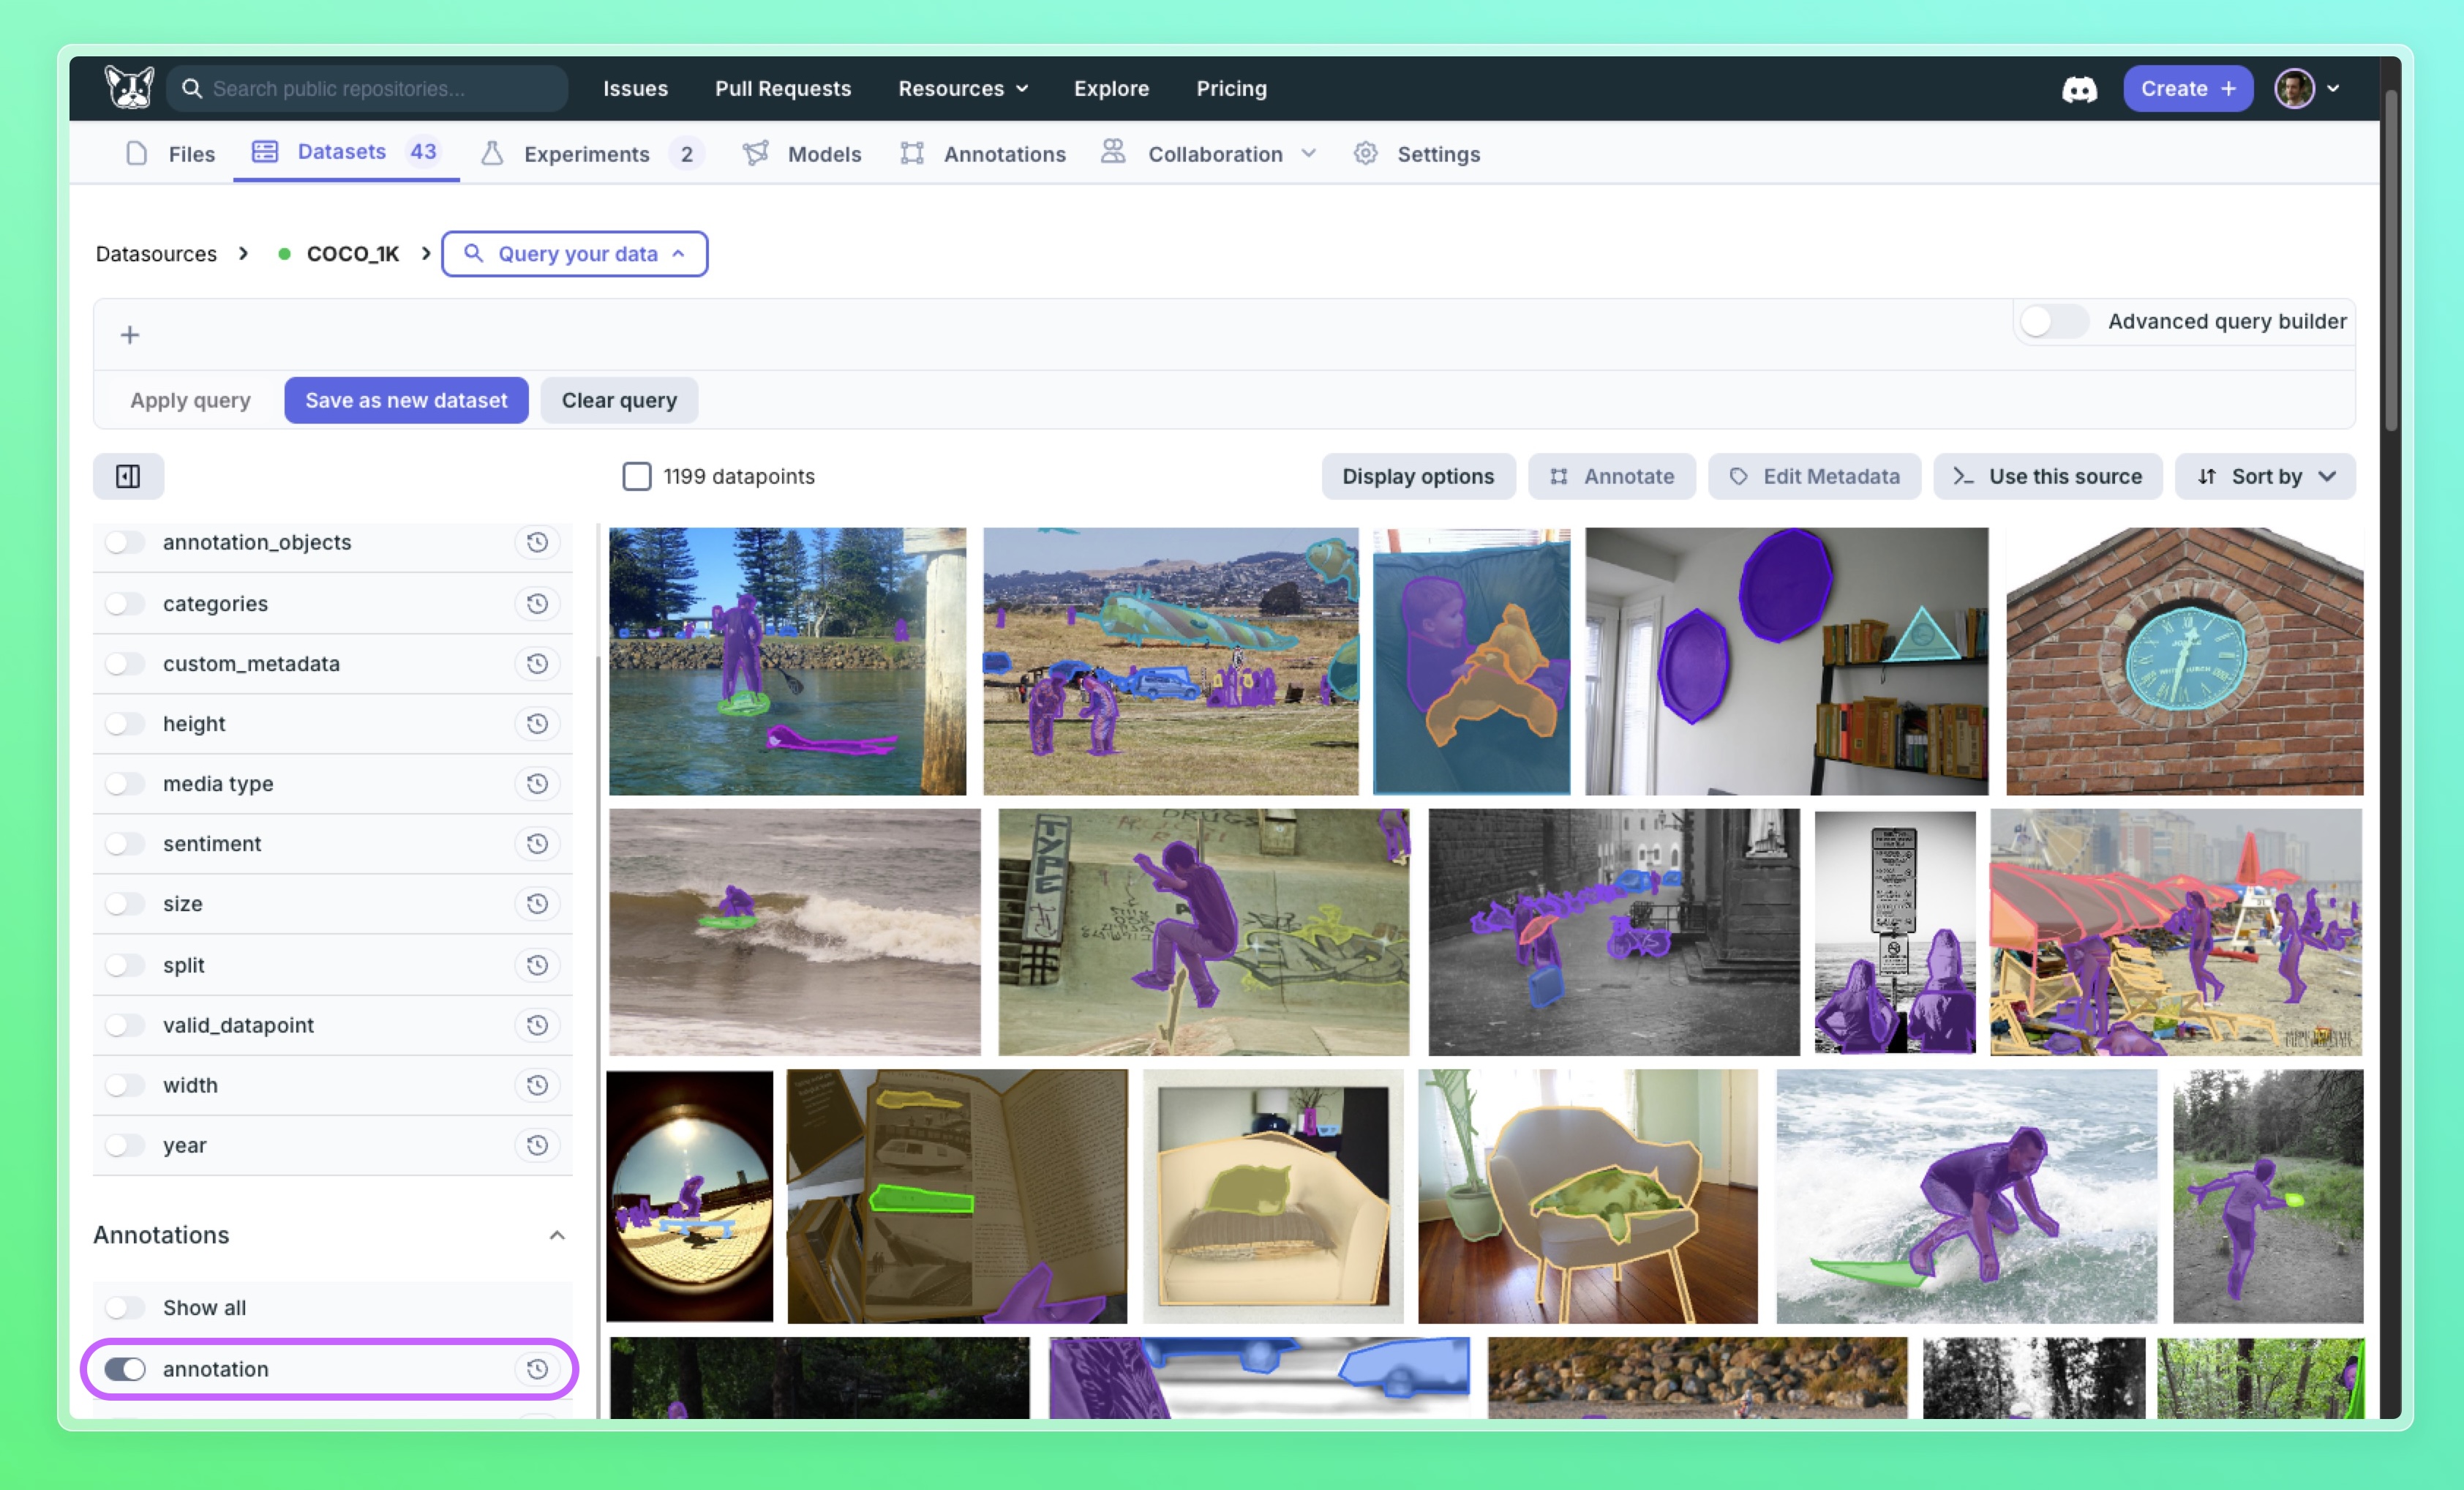
Visualizing the new annotations
After saving the annotations your enrichment fields will be updated. You can return to your dataset view, enable the relevant annotation field in the metadata sidebar, and view the various annotations.
Auto Labeling with ML Models
Label Studio supports active learning with automatic labeling with existing models. If you need this check out the docs on auto-labeling and active learning.
Next steps
Now that you have labeled your dataset, you might be interested in converting it into a dataloader for training, or, if you already know how to do that, learn how to track your experiments.