

Setup Remote Storage for Data & Models
DagsHub supports connecting external storage from AWS S3, Google Cloud Storage (GCS), Azure Blob Storage, and S3-compatible storage to DagsHub repositories. It enables to access and interact with your data and large files without leaving the DagsHub platform.
In this section, we'll cover all the required steps to set up an external remote storage for your project. We assume that you have already created a DagsHub project and added a Git remote.
Creating a Storage Bucket
If you haven't already created a storage bucket, you should set it up now. Follow the instructions in one of these links:
Explanation on how to create an S3 bucket
Explanation on how to create a Google Storage bucket
Explanation on how to crate an Azure blob storage container
Making Sure You Have Permissions
We need a minimum set of permission in order to use the bucket we created as our remote. If you have admin access to your cloud account, you might be able to skip this step. Here we assume you start without permissions and set up minimum permissions for the remote storage use case.
Copy the following JSON permission file:
{
  "Version": "2012-10-17",
  "Statement": [
    {
      "Sid": "VisualEditor0",
      "Effect": "Allow",
      "Action": "s3:ListBucket",
      "Resource": "arn:aws:s3:::<your-bucket-name>"
    },
    {
      "Sid": "VisualEditor1",
      "Effect": "Allow",
      "Action": "s3:GetObject",
      "Resource": "arn:aws:s3:::<your-bucket-name>/*"
    },
    {
      "Sid": "VisualEditor2",
      "Effect": "Allow",
      "Action": "s3:PutObject",
      "Resource": "arn:aws:s3:::<your-bucket-name>/*"
    },
    {
      "Sid": "VisualEditor3",
      "Effect": "Allow",
      "Action": "s3:DeleteObject",
      "Resource": "arn:aws:s3:::<your-bucket-name>/*"
    },
    {
      "Sid": "VisualEditor4",
      "Effect": "Allow",
      "Action": "s3:ReplicateObject",
      "Resource": "arn:aws:s3:::<your-bucket-name>/*"
    }
  ]
}
S3 public buckets:
Making a bucket public is not enough, Its required to have global ListBucket and GetObject capabilities set on the bucket permissions - Copy the following JSON permission file:
{
    "Version": "2012-10-17",
    "Id": "Policy1711548745790",
    "Statement": [
        {
            "Sid": "VisualEditor5",
            "Effect": "Allow",
            "Principal": {"AWS": "*"},
            "Action": "s3:ListBucket",
            "Resource": "arn:aws:s3:::my-bucket"
        },
        {
            "Sid": "VisualEditor6",
            "Effect": "Allow",
            "Principal": {"AWS": "*"},
            "Action":  "s3:GetObject",
            "Resource": "arn:aws:s3:::my-bucket/*"
        }
        ]
}
In GCP, you can set the permissions while creating the GS bucket. Make sure you have at least Storage Object Creator
access if you only want to push and pull and Storage Object Admin for more advanced capabilities like garbage collection.
In Azure you can set the permissions of Storage Blob Data Contributor role to the service principle on the relevant container.
Installing the Command Line Tools
The easiest way to allow you to push and pull to your remote storage is by installing the appropriate command line tools.
Follow the instructions to install the AWS CLI version 2. After installation has completed, follow the instructions to configure your AWS CLI.
What this does is save you access key to ~/.aws/credentials which DVC knows to access.
Follow the quickstart guide to install and initialize the Google Cloud SDK on your system. Alternatively you can install the Google Cloud SDK and then authorize the SDK without going through the full configuration.
This will save a configuration file in your home directory, which DVC knows to access when accessing Google Cloud Storage.
Follow the instructions here to install the Azure CLI. Follow these instructions to see how to also push data with the CLI
Connect the remote storage to DagsHub
Now that we have our bucket configured with the correct permissions, we can go to the guide on how to connect it to DagsHub.
Manage your data with DVC
DagsHub external storage support also works with DVC. If you use the supported external storage types as a DVC remote. The following section will walk you through how to do this.
Adding the DVC remote locally
This step consists of 2 parts - installing the DVC extension and configuring the remote. If at this point you still don't have DVC installed, you should install it.
Installing the DVC extension
Type in the following command (according to the service you are using):
pip3 install 'dvc[s3]'
pip3 install 'dvc[gs]'
pip3 install 'dvc[azure]'
pip3 install 'dvc[all]'
After the installation reopen the terminal window to make sure the changes have taken place.
Configuring the remote in DVC
Define the dvc remote. We do this with one command (don't forget to replace the bucket name with your own bucket):
dvc remote add <remote-name> s3://<bucket-name>/<key>
dvc remote add <remote-name> gs://<bucket-name>/<path>
dvc remote add <remote-name> azure://<container-name>/<blob-path>
Consider using --local
It is our opinion that the configuration of the remote may vary between team members (working in various environments)
and over time (if you switch between cloud providers),
therefore it is prudent not to modify the .dvc/config file which is monitored by Git.
Instead, we prefer to use the local configuration instead. You can find it in .dvc/config.local,
and confirm that it's ignored in .dvc/.gitignore.
That way you don't couple the current environment configuration to the code history.
This is the same best practice which naturally occurs when you run git remote add - the configuration is only
local to your own working repo, and won't be pushed to any git remote.
Pushing files to the DVC remote storage
Is as simple as one command.
dvc push -r <remote-name>
Connect DagsHub to the DVC Remote Storage
We automatically detect your remote location normally.
If you used the --local option when configuring your DVC remote, follow the instructions here:
Connecting DagsHub to a remote configured with --local
To reap the benefits of doing this while using DagsHub to host your repo, go to your repo settings,
and add the link to the bucket in the Advanced Settings Local DVC cache URL. In our case it looks something like this:
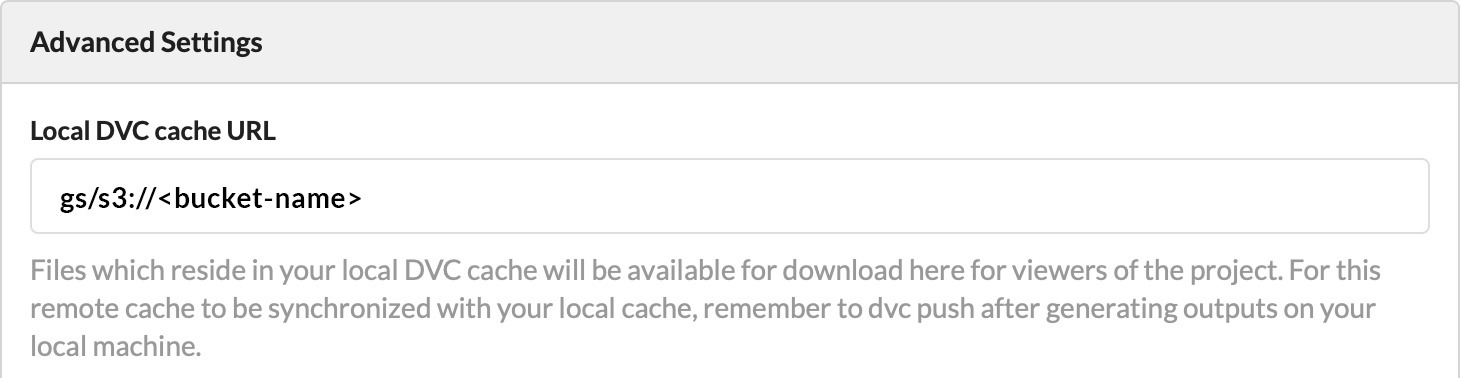 Local DVC cache URL setting
With DagsHub, when you track files with DVC you'll see them both in your file viewer, and in your pipeline view.
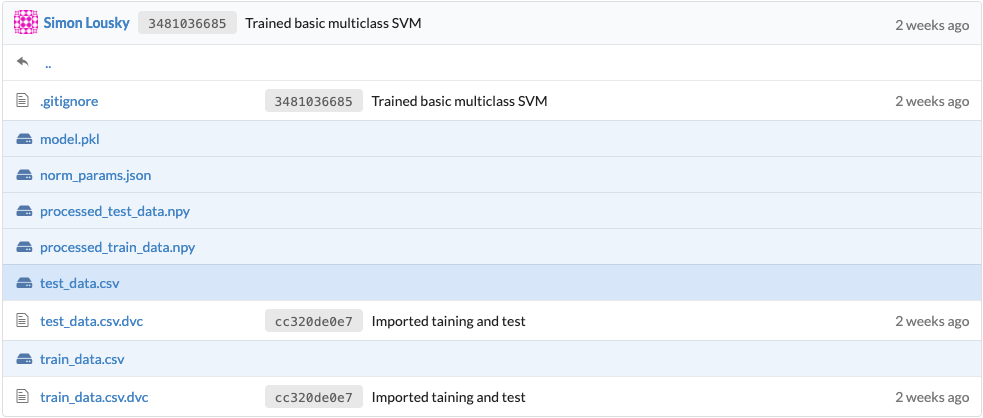 File viewer with blue files that are DVC tracked
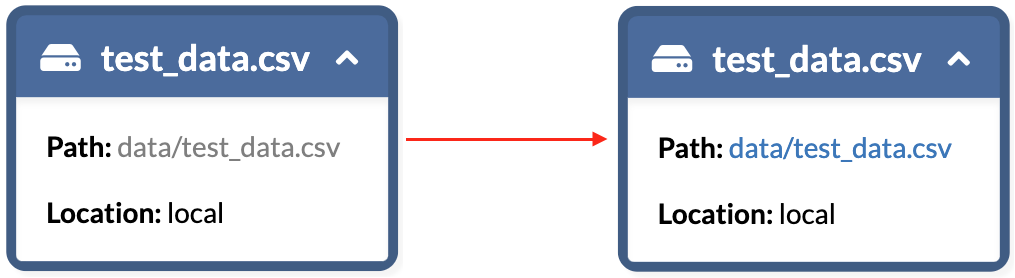
After connecting your remote storage to DagsHub, these files now have functioning links, and are therefore available for viewing or download for anyone who would want to (provided they have authorization to your bucket, of course).
We believe this is useful for several reasons:
- If you want to let someone browse your data and trained models, you can just send them a link to your DagsHub repo. They don't need to clone or run anything, or sift through undocumented directory structures to find the model they are looking for.
- The files managed by DVC and pushed to the cloud are immutable - just like a specific version of a file which is saved in a Git commit, even if you continue working and the branch has moved on, you can always go back to some old branch or commit, and the download links will still point to the files as they were in the past.
- By using DVC and DagsHub, you can preserve your own sanity when running a lot of different experiments in multiple parallel branches. Don't remember where you saved that model which you trained a month ago? Just take a look at your repo, it's a click away. Let software do the grunt work of organizing files, just like those wonderfully lazy software developers do.
Warning
When downloading a link through the graph, it might be saved as a file with the DVC hash as its filename. You can safely change it to the intended filename, including the original extension and it'll work just fine.