Launching ML Model Registry and Deployment on DagsHub with MLflow
We have some exciting news! MLflow is an amazing open-source project and one of the first integrations we launched at DagsHub. We’re now excited to be doubling down on that integration – Today, we’re launching:
- Support for zero-configuration MLflow artifact storage based on DagsHub storage
- Support for MLflow Model Registry and deployment
- A full-fledged MLflow UI built into every DagsHub project
- Full support for the MLflow API.
TL;DR – This means DagsHub users are now able to log models directly to DagsHub from Python, set tags for models in a UI or via API for things like “Production” and “Staging” models, and use it as a base for deploying it on their favorite infrastructure providers. It also means that if you need—or just prefer—the familiar MLflow UI, but require a centralized hosted version, you get it out of the box with DagsHub.
The rest of this blog will cover the motivation behind this launch and quickly review how you can set up an ML model registry on DagsHub with MLflow.
Why we decided to add an ML model registry and artifact store to DagsHub
DagsHub is the home for data science collaboration. As such, we are building a central source of truth for all your data science and machine learning components, and providing a collaborative experience on top via things like Discussions and Reports. These components are Data, Code, Experiments, Pipelines, and of course Models.
It’s critical that any manipulation of these is contextualized by the requirements of the real world—the ability to take them forward all the way to production and trace them back to their origin.
In that view, adding native support for a model registry on DagsHub was the next logical step—allowing users to manage, orchestrate, and trace their trained models in exactly the way they already can with code, data, experiments, and pipelines. Accomplishing this via MLflow, a tool that hundreds of thousands of data scientists use, and that we already had a deep integration with, made perfect sense.
That means that as always, you get our special added value: use a tool and format that many people know, love, and put in production, while benefiting from a much smoother experience and tons of bonus features—including collaboration, access controls, and a tight connection to all the other components of your project.
Let’s see how you can put this to use.
Setting up a repository
Create a new repository on DagsHub for your project. That’s it. Once you’ve gone through this, you can find the new MLflow UI by simply appending .mlflow to the repository’s URL (that is, https://dagshub.com/{user}/{repo}.mlflow).
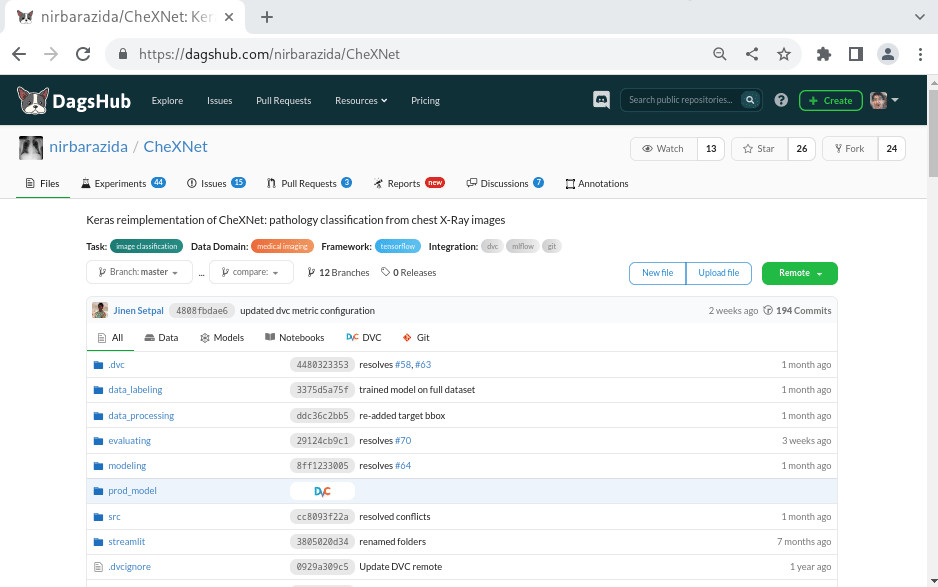
Alternatively, you can click the super handy “Go to mlflow UI” button in the Remotes menu of the repository!
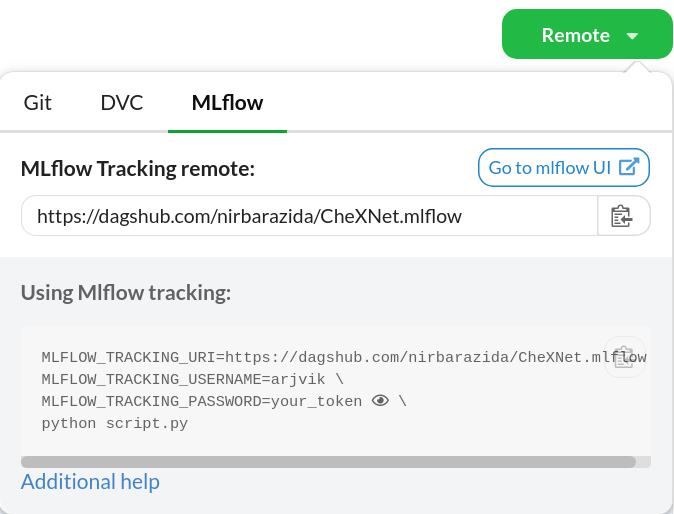
The artifact store and model registry are both pre-configured so that models logged to MLFLOW_TRACKING_URI are stored on DagsHub storage.
Logging Models
Instrumenting your code to track training and log models to the DagsHub MLFlow tracking server requires just a single line of code! (Okay, two if you count the import mlflow.)
mlflow.<framework>.autolog(registered_model_name="<model name>")
where <framework> is one of
pytorch(lightning)tensorflowkerassklearnfastaixgboost- or any of the other MLFlow-supported model flavors
Authenticating your MLflow API calls
DagsHub’s MLflow server has built-in access controls, in order to enable access only to users with appropriate permissions. Users can have admin, write, or read-only permissions for a repository, and the MLflow UI will be available to everyone with either write or admin permissions.
To authenticate your code with our MLFlow tracking server, you’ll need to set the following environment variables:
export MLFLOW_TRACKING_URI=https://dagshub.com/{username}/{repo_name}.mlflow \
       MLFLOW_TRACKING_USERNAME={username} \
       MLFLOW_TRACKING_PASSWORD={api_token_or_password}
You can get your API token at the following URL: https://dagshub.com/user/settings/tokens. This is personal, so don’t share it with others, or commit it to your Git repo as part of your code.
You can also obtain these variables from the MLflow tab of the Remotes dropdown on your repository page.
Once you define these environment variables and add the single line of instrumentation code, you should notice your experiment parameters and metrics as well as models being automagically logged to your DagsHub MLflow server!
Viewing Model Registry
Once you’ve finished logging your models, you can find them in the MLflow UI on DagsHub—remember, just append .mlflow to your repository URL to launch it!—under the artifacts section of a single run.
Once you’ve finished logging your models, you can find and manipulate them right in the MLflow UI on DagsHub—remember, simply press the “Go to mlflow UI” button under the Remotes dropdown on your repository page!
From the MLflow Experiments tab, you can select a run, see any of its artifacts from DagsHub storage, and register them in the Model Registry. If you go to the MLflow Models tab, you can then view and update the model registry for the project. Each model in the registry has multiple versions, and you can transition the stage of each version from “None” (experimentation) to “Staging,” “Production,” and “Archived!”
Zero-Code Deployment
Once you’ve registered your model, deploying it on your infrastructure—local or cloud—is super straightforward! With a single command, you can take a model from your registry and deploy it to AWS SageMaker, Azure ML, a Spark cluster, or your own Kubernetes infrastructure.
First, ensure that you have set the MLFLOW_TRACKING_* environment variables from above.
To build a ready-to-deploy docker image from your model, run
mlflow models build-docker -m 'models:/{mlflow-model-name}/{version}' -n {desired-image-name} --enable-mlserver
where {mlflow-model-name} is the name of the model in the model registry, and {version} is either
- the version number of the model
- the string
'latest'for the most recently uploaded version of the model (for Continuous Integration) - the string
'staging'for the current staging model (for QA) - the string
'production'for the current production model (for final deployment)
The built image will use the robust, open-source Seldon MLServer to expose your model's API (conforming to the standardized V2 Inference Protocol). You can then take this image and push it to an OCI registry, or directly deploy it to your Kubernetes cluster using kubectl.
Alternatively, you can choose to deploy your model directly to a managed cloud server. For instance, to deploy it to AWS SageMaker, run
mlflow sagemaker deploy -m 'models:/{mlflow-model-name}/{version}' -a {desired-api-name} --region-name {re --mode replace -e {sagemakerrole-arn}
(If this is your first time deploying an MLflow model to SageMaker in this particular AWS region, you’ll need to run mlflow sagemaker build-and-push-container first beforehand.)
And voila! However you’ve chosen to do so, with a single additional line of instrumentation code, and a single shell command, you’ve turned the trained model from an experimentation run into a production-ready inference API! How’s that for ease of use?
Next Steps With Your Own ML Model Registry
Now that you’ve seen the capabilities of the DagsHub x MLflow integration V2, you can start logging your own models and deploying them. This will make your projects more production oriented, and take them to the next level. All these features are fully available in the free tier of DagsHub. Just sign up to get started.