How To Install Kubeflow Locally
- Yono Mittlefehldt
- 9 min read
- 2 years ago

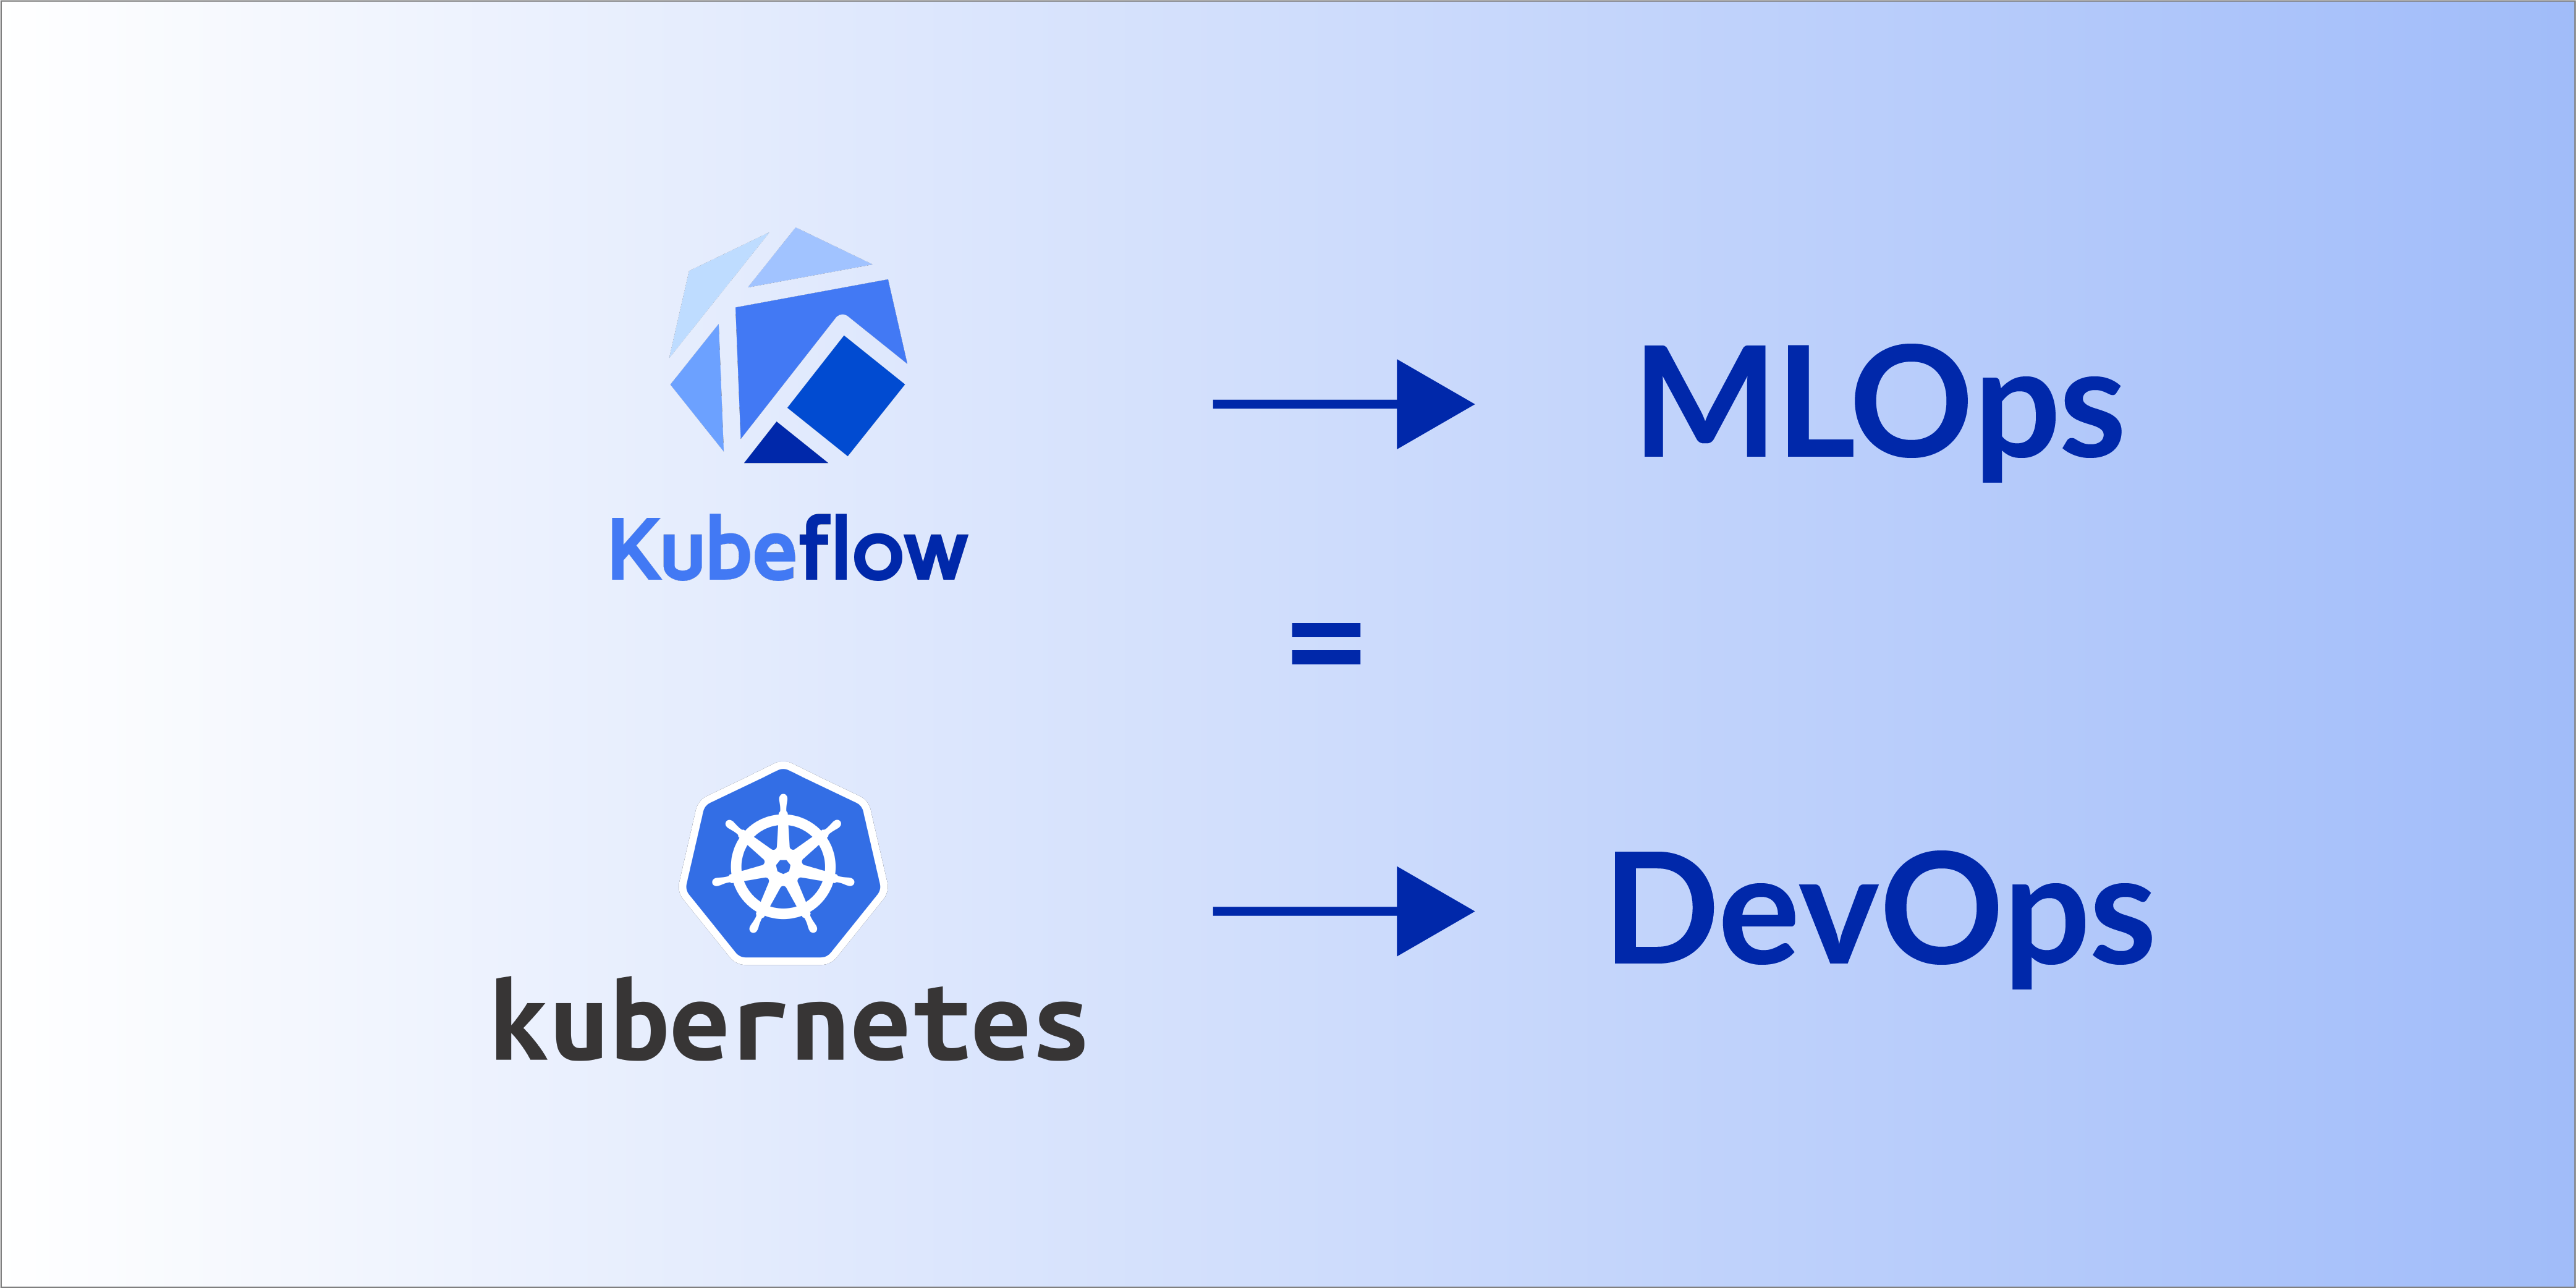
TL;DR: Kubeflow is to MLOps as Kubernetes is to DevOps. Learn how to install it locally to test it out and see if it's right for you.
MLOps, like its older sibling, DevOps, is a hard problem. And what do engineers do, when faced with hard problems? They create tools to simplify those problems into manageable chunks.
Typical DevOps problems were simplified by using containers, such as Docker. As projects used more and more containers, a container orchestrator, like Kubernetes (K8s) became a necessity. As each problem arose, developers and engineers created amazing solutions to simplify DevOps.
MLOps is going through similar growing pains that DevOps did. You can use Docker and K8s for MLOps, but these get you only so far. MLOps is like a specialized form of DevOps and as such, potentially has different needs or problems. That’s where Kubeflow comes in.
What is Kubeflow?
Kubeflow is an open-source platform designed to simplifies the process of building and deploying machine learning products at scale on Kubernetes. In fact, it builds on top of K8s, as you can see in the following diagram of it’s place in the stack:

Kubeflow provides a set of tools and frameworks to help with distributed training, serving, and monitoring models.
What can I do with Kubeflow?
Kubeflow can be used by data scientists during the research and experimentation phase. It supports running Jupyter notebooks directly in your K8s cluster, giving you the same hardware as your final deployments.
Data scientists can use Kubeflow to train machine learning models using popular deep learning frameworks like TensorFlow and PyTorch. Kubeflow provides tools for distributed training, hyperparameter tuning, and managing experiments.
Kubeflow can also be used by machine learning engineers to deploy systems for development, testing, and production. It gives them the tools to monitor model performance metrics, so they can react quickly when something changes.
How can I install Kubeflow?
That is the question, isn’t it?
It’s hard to find information on installing Kubeflow locally online. Most documentation online tells you how to install Kubeflow on a cloud services, such as AWS or GCP. This makes sense since, Kubernetes will generally be run on a cluster of computers. However, how can you easily test out Kubeflow to see if it’s right for your situation, if you have to spin up a K8s cluster in the cloud?
Ideally, you would be able to install Kubeflow locally for experimentation and potentially debugging purposes. That’s what this guide is here to show you!
What do I need in order to install Kubeflow locally?
To install Kubeflow locally, you need a few tools.
We’ll assume you have knowledge of Docker, as it is basically a prerequisite for working with Kubernetes. If you are unfamiliar with Docker, check out this tutorial to get you up to speed, then come back here.
Since Kubeflow runs on Kubernetes, you need to be able to run a K8s cluster locally. For that, we turn to minikube. Minikube is a great tool that allows you to quickly setup a local cluster on a single machine. It can run on Linux, macOS, and Windows.
Additionally, you’ll need the following tools:
- kubectl, which is a command-line tool to manage your K8s cluster
- kustomize to configure applications using YAML
Using both kustomize and kubectl, you’ll be able to install and setup Kubeflow itself, including a convenient dashboard to control Kubeflow.
Let’s get started!
What is minikube and how do I install it?
As mentioned, minikube is a tool that can help setup a cluster locally on your machine. For a bit of terminology, your computer is a single node, which will host the pods. These pods run your application containers. Pods are manages by a deployment, which describes the desired state of your Kubernetes application.
To install minikube on Linux, check out their handy start page. Here you select your OS, CPU architecture, release type, and installation type. For instance, installing on a Linux machine running an 64-bit x86 processor, you could install minikube with two commands:
curl -LO <https://storage.googleapis.com/minikube/releases/latest/minikube-linux-amd64>
sudo install minikube-linux-amd64 /usr/local/bin/minikube
The first command downloads the appropriate binary, while the second installs it to the proper location.
What is kubectl and how do I install it?
kubectl is a command line tool to control your K8s cluster. It’s a self-described “swiss army knife”, which “can do many things”. It’s a key tool for managing a cluster.
You have several options to install kubectl. Checkout the installation page for instructions for your platform.
If you use Snaps to manage your app packages, you can install kubectl with a single line:
sudo snap install kubectl --classic
But wanna hear a secret? You don’t need to do any of the above instructions to install kubectl. Why? Because minikube can download the appropriate version of kubectl automatically for you.
If you go this route, the commands will change slightly. For instance, if you want to list (get) all pods running in all namespaces, you would normally run:
kubectl get pods -A
With minikube the command would look like this:
minikube kubectl -- get pods -A
However, to make life easier, you can alias the command:
alias kubectl="minikube kubectl --"
This allows you to use kubectl as you normally would.
What is kustomize and how do I install it?
Kubernetes is controlled by a mountain of YAML files. kustomize is a tool to make customization easier. It lets you customize raw, template-free YAML files, while leaving the original YAML untouched and usable as is.
Check out the installation guide to find an appropriate method to install for your system. For example, to install on Linux you could run:
curl -s "<https://raw.githubusercontent.com/kubernetes-sigs/kustomize/master/hack/install_kustomize.sh>"  | bash
sudo install kustomize /usr/local/bin/kustomize
How do I install Kubeflow?
Now that you have the prerequisite software installed, it’s time for the main show.
The easiest way to install Kubeflow locally is to use the manifest files from the Git repo.
Follow these steps:
- Clone the manifests repo from the Kubeflow team:
git clone <https://github.com/kubeflow/manifests.git>
- Change to the repo directory:
cd manifests
- Build and apply the YAML files for all Kubeflow components:
while ! kustomize build example | awk '!/well-defined/' | kubectl apply -f -; do echo "Retrying to apply resources"; sleep 10; done
- Wait for everything to settle out.
You can check to see if everything has settled out by running:
kubectl get pods -A
This will list all pods across all namespaces. As long as the status is Running for all of them, you’re good to go. If any of them are not, sometimes you just need to wait a little longer. Your list should look something like this:
NAMESPACE         NAME                                     READY  STATUS    RESTARTS      AGE
auth              dex-7ff46847-sqxzj                       1/1    Running   0             10h
cert-manager      cert-manager-7fb78674d7-nllnn            1/1    Running   0             10h
cert-manager      cert-manager-cainjector-5dfc946d84-m6f7  1/1    Running   0             10h
cert-manager      cert-manager-webhook-8744b7588-cvzzm     1/1    Running   0             10h
istio-system      authservice-0                            1/1    Running   0             10h
istio-system      cluster-local-gateway-675bb7b74-49x27    1/1    Running   0             10h
istio-system      istio-ingressgateway-c7fdd4bf6-z68qt     1/1    Running   0             10h
istio-system      istiod-6995577d4-7h6zv                   1/1    Running   0             10h
knative-eventing  eventing-controller-86647cbc5b-62tl4     1/1    Running   0             10h
knative-eventing  eventing-webhook-6f48bb5f4c-c5ljb        1/1    Running   0             10h
knative-serving   activator-855b695596-zrfrr               2/2    Running   0             10h
knative-serving   autoscaler-7cbddfc9f7-gjckn              2/2    Running   0             10h
knative-serving   controller-6657c556fd-q728z              2/2    Running   0             10h
knative-serving   domain-mapping-544987775c-bffh5          2/2    Running   0             10h
knative-serving   domainmapping-webhook-6b48bdc856-bmllz   2/2    Running   0             10h
knative-serving   net-istio-controller-6fbdbd9959-bmglm    2/2    Running   0             10h
knative-serving   net-istio-webhook-7d4879cd7f-xwsl5       2/2    Running   0             10h
knative-serving   webhook-665c977469-rw6v6                 2/2    Running   0             10h
kube-system       coredns-787d4945fb-mgpsr                 1/1    Running   1 (10h ago)   10h
kube-system       etcd-minikube                            1/1    Running   2 (52s ago)   10h
kube-system       kube-apiserver-minikube                  1/1    Running   1 (10h ago)   10h
kube-system       kube-controller-manager-minikube         1/1    Running   2 (8h ago)    10h
kube-system       kube-proxy-l4tvb                         1/1    Running   1 (10h ago)   10h
kube-system       kube-scheduler-minikube                  1/1    Running   1 (10h ago)   10h
kube-system       nvidia-device-plugin-daemonset-cd6h8     1/1    Running   0             10h
kube-system       storage-provisioner                      1/1    Running   2 (10h ago)   10h
kubeflow          admission-webhook-deployment-6d48f6f745  1/1    Running   53 (10h ago)  10h
kubeflow          cache-server-6b44c46d47-lvcqr            2/2    Running   0             10h
kubeflow          centraldashboard-f966d7897-ltjhn         2/2    Running   0             10h
kubeflow          jupyter-web-app-deployment-795dcd4c9b-r  2/2    Running   0             10h
kubeflow          katib-controller-746969dc99-2fz29        1/1    Running   53 (10h ago)  10h
kubeflow          katib-db-manager-5ddbffd67-w429n         1/1    Running   0             10h
kubeflow          katib-mysql-66c8cdff4f-mrhz9             1/1    Running   0             10h
kubeflow          katib-ui-58b54d465f-kxmv2                2/2    Running   1 (10h ago)   10h
kubeflow          kserve-controller-manager-96b896c66-84v  2/2    Running   0             10h
kubeflow          kserve-models-web-app-9fbcd79f5-xksvx    2/2    Running   0             10h
kubeflow          kubeflow-pipelines-profile-controller-6  1/1    Running   0             10h
kubeflow          metacontroller-0                         1/1    Running   0             10h
kubeflow          metadata-envoy-deployment-7b49bdb748-tn  1/1    Running   0             10h
kubeflow          metadata-grpc-deployment-6d744c66bb-fkt  2/2    Running   3 (10h ago)   10h
kubeflow          metadata-writer-5bfdbf79b7-b5trj         2/2    Running   0             10h
kubeflow          minio-549846c488-x7jj6                   2/2    Running   0             10h
kubeflow          ml-pipeline-86d69497fc-mvtb9             2/2    Running   53 (10h ago)  10h
kubeflow          ml-pipeline-persistenceagent-5789446f9c  2/2    Running   0             10h
kubeflow          ml-pipeline-scheduledworkflow-fb9fbd76b  2/2    Running   0             10h
kubeflow          ml-pipeline-ui-74fcbdddd9-sm7dd          2/2    Running   0             10h
kubeflow          ml-pipeline-viewer-crd-bdf696cb9-97tks   2/2    Running   1 (10h ago)   10h
kubeflow          ml-pipeline-visualizationserver-845d745  2/2    Running   0             10h
kubeflow          mysql-5f968h4688-dlgv4                   2/2    Running   0             10h
kubeflow          notebook-controller-deployment-576df594  2/2    Running   2 (10h ago)   10h
kubeflow          profiles-deployment-7bc6469cdd-r5vzw     3/3    Running   53 (10h ago)  10h
kubeflow          tensorboard-controller-deployment-84954  3/3    Running   1 (10h ago)   10h
kubeflow          tensorboards-web-app-deployment-74bc589  2/2    Running   0             10h
kubeflow          training-operator-7c5456c65-fsqdr        1/1    Running   0             10h
kubeflow          volumes-web-app-deployment-86dddc89d4-8  2/2    Running   0             10h
kubeflow          workflow-controller-56cc57796-gjtd9      2/2    Running   1 (10h ago)   10h

How do I setup a Kubeflow Dashboard?
Once Kubeflow is up and running, you need to do at least one more step, to access the builtin dashboard. You need to forward the correct port to the proper service. The dashboard is accessed via http requests routed through the istio-ingressgateway service in the istio-system namespace. To forward the port, you use kubectl:
kubectl port-forward svc/istio-ingressgateway -n istio-system 8080:80
This tells your cluster to listen on port 8080 locally and forward it to the service on port 80. You can then reach the dashboard at http://localhost:8080.
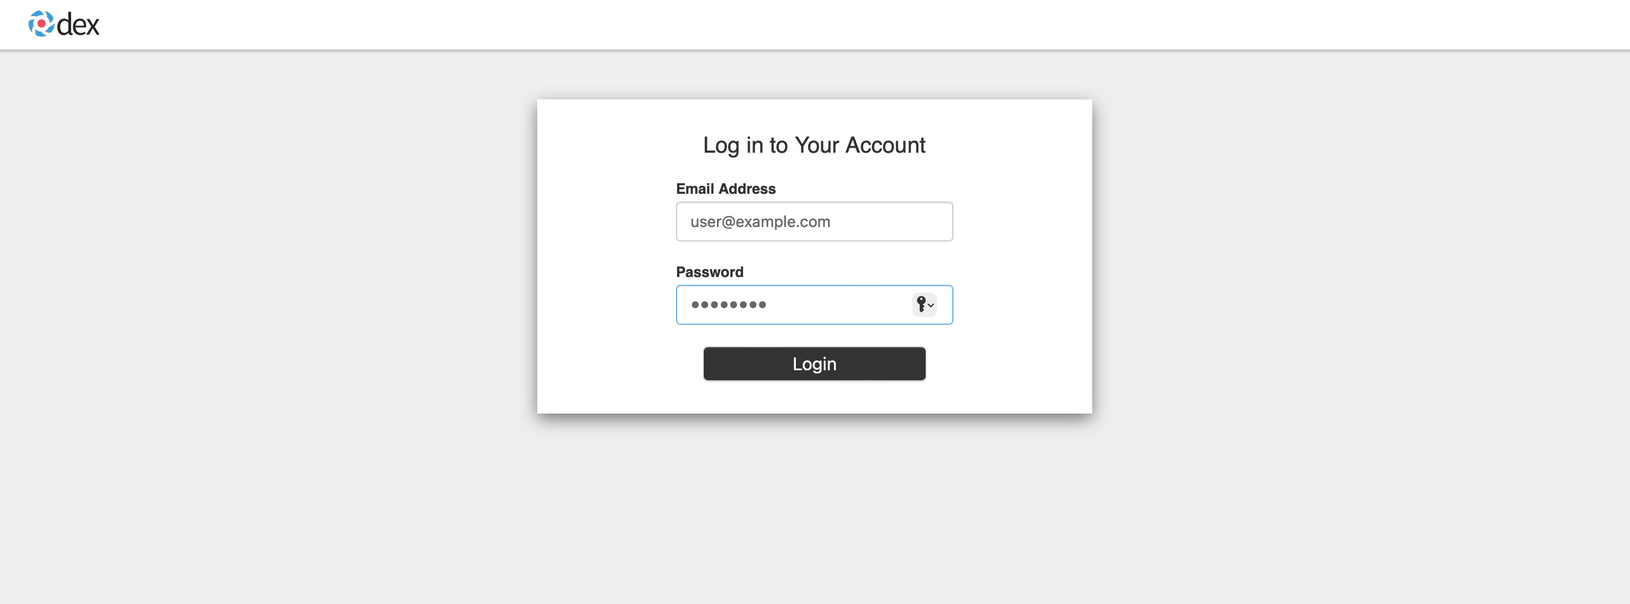
The default username is user@example.com and the password is 12341234. Once you log in, you will be greeted by the Kubeflow dashboard.
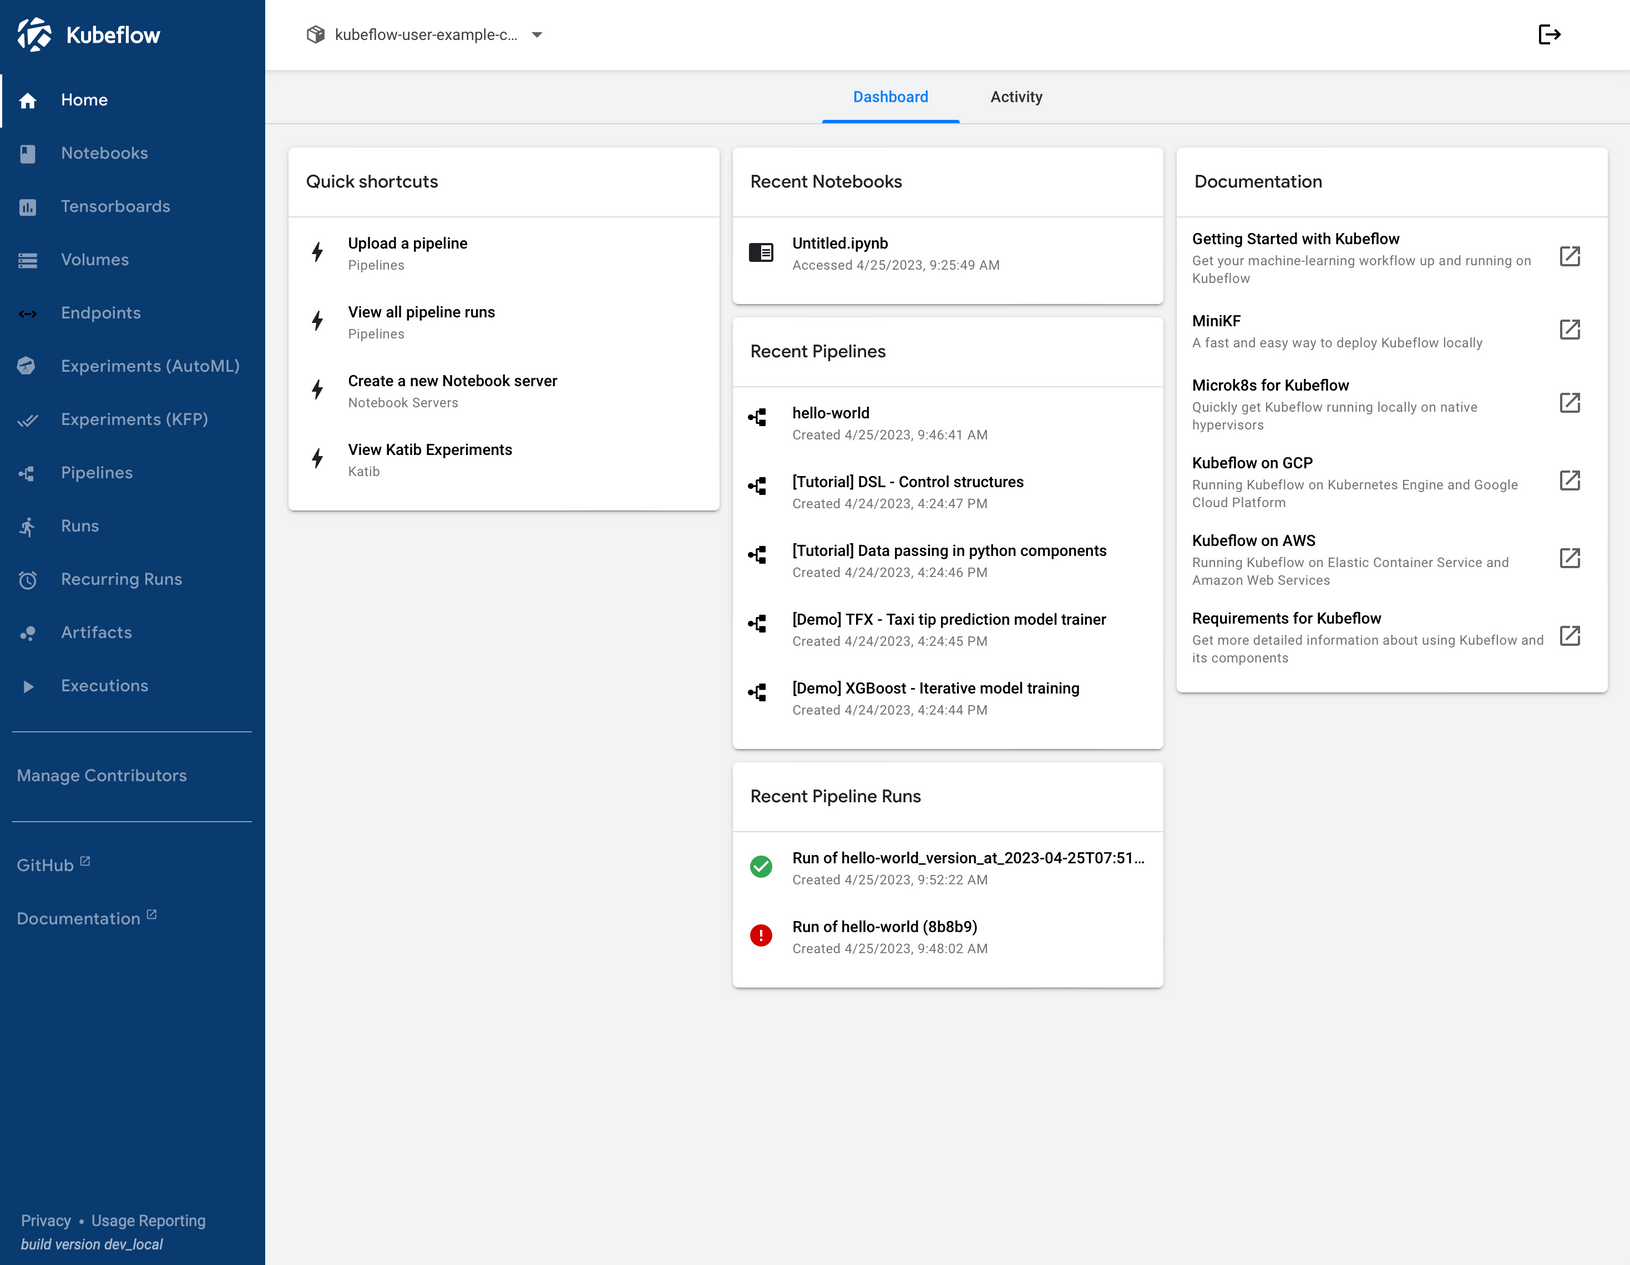
From here you can check out Kubeflow’s components documentation to learn more about the dashboard and how to get started with it.
How do I stop everything?
You can stop everything you’re running by stopping minikube:
minikube stop
But keep in mind that this doesn’t remove your Kubeflow cluster. It just stops it. The next time you run minikube start, it would attempt to restart all your Kubeflow pods and services.
If you want to delete your Kubeflow cluster, run:
minikube delete
Troubleshooting
A few pods are stuck with a STATUS of CrashLoopBackoff
First, wait a little longer. Sometimes it takes quite a few minutes for everything to settle down. If you’ve waited longer than you car, the run:
kubectl logs <name_of_crashing_pod> -n <namespace_of_crashing_pod>
If you see something like:
Error: too many open files
You can fix it by running the following commands:
sudo sysctl fs.inotify.max_user_instances=1280
sudo sysctl fs.inotify.max_user_watches=655360
Then wait again for it to retry.
Congratulations! You’ve now setup Kubeflow on a local machine! To do so, you’ve installed and learned about:
- minikube
- kubectl (optionally)
- kustomize
This is a huge achievement and a great start to learning more about Kubeflow (and potentially Kubernetes in general).
Ready to run Kubeflow on more than just one machine? In our next post, we’ll show you how to set up Kubeflow to run on AWS!
If you have any questions, feel free to reach out. You can join our Discord, where we’ve built a vibrant, helpful and friendly community.