Configure a DVC remote without a DevOps degree
- Martin Daniel
- 5 min read
- 5 years ago
Developer @ DAGsHub
Its easy with DagsHub Storage
DVC is a great tool; it lets you track and share your data, models, and experiments. It also supports pipelines to version control the steps in a typical ML workflow. To share your data and models, you will need to configure a DVC remote (such as S3, GCloud Storage, GDrive, etc.), but doing so can be a hassle and take a tremendous amount of time.

In this post, I'll show you that this configuration shouldn't have to be so difficult; it should be smooth and easy. To solve this issue, we created DAGsHub Storage, a DVC remote that is super easy to configure, with no credit card, no need to grant complex permissions, and no cloud setup. Just five commands and you are ready to go!
To start, you will need to have a project on DAGsHub. There are two ways to do this, either create one from scratch or connect an existing project from any other platform (We support GitHub, GitLab, BitBucket, and any other accessible Git remote).
If you need, we have a tutorial on how to start a new project on our platform.
In order to continue with this tutorial you will need to install DVC first.
After DVC is installed, in a Git project, initialize it by running
dvc init
This command will create .dvc/.gitignore , .dvc/config, .dvc/plots, and .dvcignore. These entries can be committed with
git commit -m "Initialize DVC"
For the purpose of this tutorial I've created a new project with the following structure
data
├── processed
│   ├── test_text.txt
│   └── train_text.txt
└── raw
    └── test_full.txt
To start tracking our data, either a file or a directory, we use dvc add
dvc add data
Here is where DVC does its magic. It stores metadata about the entry added in a .dvc file; this is a small text file containing information about how to access the original entry but not the original entry itself. This command also adds the added entry to the .gitignore file, so we won't commit it by accident.
In our case DVC created a file called data.dvc, which will look like this
outs:
- md5: 61b3e1a6439d6770be4d210b758f6cbd.dir
  size: 0
  nfiles: 3
  path: data
This is the file that will be versioned by Git.
Following this step we are ready to commit the .dvc file as we would do with any source code.
git add data.dvc .gitignore
git commit -m "Add data"
Storing the data remotely
Excellent! We are now tracking the versions of our data, and now we have to figure out where to store the data itself.
As I mentioned before, I will show you how to effortlessly configure a DVC remote. Following five simple commands, you will be pushing your data and models alongside your code. For easy comparison, I'll also show you the traditional way to set up remotes, so you can easily understand the time saved by using DAGsHub Storage.
How to do it without a DevOps degree
At DAGsHub, we automatically create a DVC remote with every project on the platform to push your data and models just as you receive a Git remote to push your code. This is where the simplicity starts showing! To push or pull data from this URL, we will use our existing DAGsHub credentials (via HTTPS basic authentication). Meaning we don't need to configure any IAM, provide Access tokens to access your bucket, or anything else related to a cloud provider.
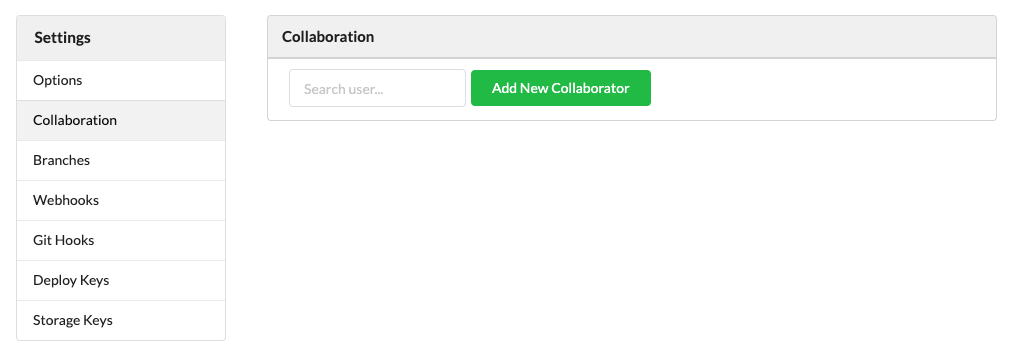
Public repositories will have publicly readable data, same as the code. If you want to share or receive data from a collaborator, add them as a project collaborator. If your repository is private only maintainers will be able to pull or push data to it.
Let's get our hands dirty!
- We need to add DAGsHub as our DVC remote
dvc remote add origin --local <https://dagshub.com/><username>/<repo_name>.dvc
- Next we need to tell DVC how to ask for our credentials
dvc remote modify origin --local auth basic
dvc remote modify origin --local user <username>
dvc remote modify origin --local ask_password true
- And finally, push the data to the new remote
# Make sure you are using DVC 1.10 or greater for the next command
dvc push -r origin
And that's it! Just 5 commands and you configured your DVC remote effortlessly, we never opened a cloud provider webpage, handled complicated IAM, or provided credit card information.

If you need more information about DAGsHub Storage, you can read our Feature Reference
How to do it WITH a DevOps degree – A Comparison
Before we dig into this section, DAGsHub currently supports AWS S3 and GCS in addition to DAGsHub Storage. If your goal was setting up a DVC remote in the easiest way, you're already done.
For the sake of this comparison, let's see how to do it for Amazon S3.
- Hire AWS as your cloud provider. This involves taking out your credit card (If you already have an account, you can skip this step)
- Set up a bucket to store your data
- Install the AWS CLI tool
- Log in to AWS using the CLI tool
- If the user who is going to use the bucket is not an admin, create an IAM user
- Assign the correct permissions to use the bucket
{
    "Version": "2012-10-17",
    "Statement": [
        {
            "Effect": "Allow",
            "Principal": {
                "AWS": "<IAM-user-ARN>" (e.g: "arn:aws:iam::7777777:user/dags-lover")
            },
            "Action": [
                "s3:GetObject",
                "s3:PutObject",
                "s3:ListBucket",
            ],
            "Resource": [
                "arn:aws:s3:::/*"
                "arn:aws:s3:::"
            ]
        }
    ]
}
A lot of things, right? All these steps are prone to errors even for the most experienced users, so if you are doing this for the first time, expect to miss something.
It doesn't end there. If you want to integrate DAGsHub, you will need to add a Storage Key to your project settings so we will be able to list, show, and diff your files on our file viewer.
You will find this settings page on https://dagshub.com/<username>/<repo_name>/settings/storage/keys
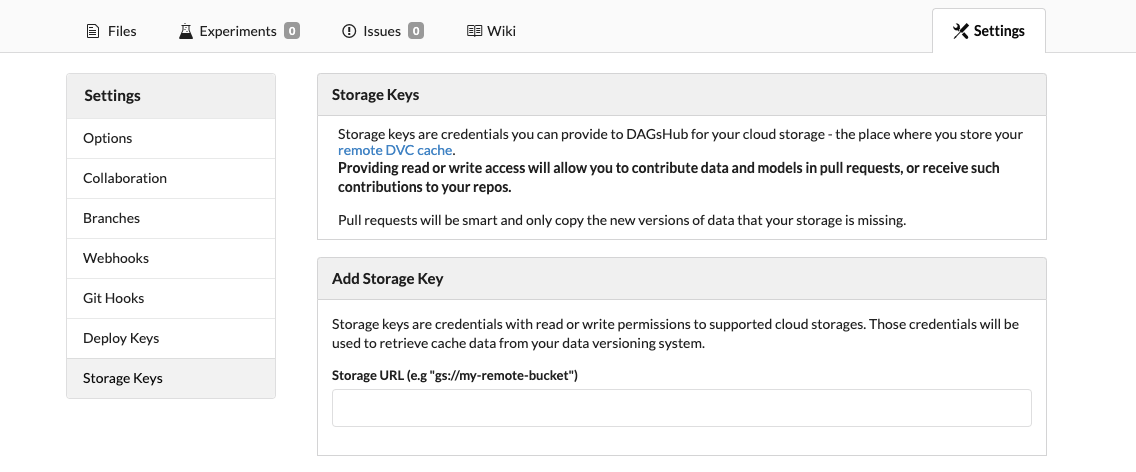
Once you enter your bucket URL you will receive all the instruction to add the storage key.
Keep up! We haven't finished yet! Now you will need to install the S3 package for DVC
pip install "dvc[s3]"
#Or if you are using poetry
poetry add dvc --extras "s3"
Following this, we will need to add the bucket as our remote
dvc remote add s3-remote s3://your-bucket/storage
And finally, we push our data
dvc push -r origin

Learn more
I hope this helped you understand how to set up a DVC remote (an easy way and a hard way). For more information about DAGsHub, check out our website, documentation, or join our Discord community.